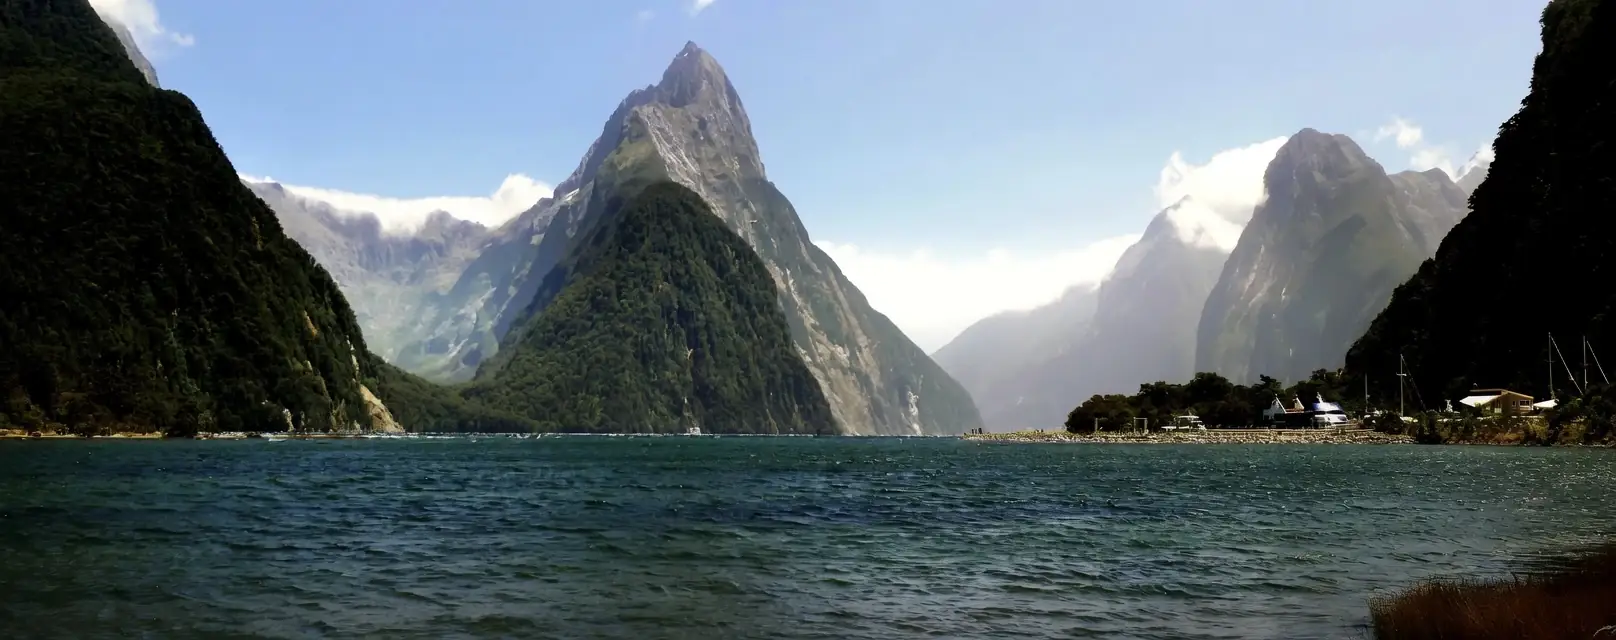
New Zealand · North & South Island
Coromandel to Fiordland
Glowworm caves, geothermal country, the West Coast by road, dark skies and Milford Sound.
New Zealand · North & South Island
Glowworm caves, geothermal country, the West Coast by road, dark skies and Milford Sound.
Length
16 days
When
22 Jan – 6 Feb 2027
Where
North & South Island
Add on
Bay of Islands · Australia
Estimated
$4,090 per person
From the beaches of the Coromandel to Rotorua’s geothermal country, across the Southern Alps and down the wild West Coast to Aoraki and Fiordland, this journey takes in the remarkably different landscapes and experiences of New Zealand. Along the way are glowworm caves, Māori culture, alpine lakes, glaciers, dark skies and Milford Sound — with enough time in each place to experience it rather than simply pass through.
Trip highlights
The route
How this trip is structured
Choose any combination. The middle sixteen days are the trip; the beginning and the Australia add-on are yours to decide.
The Bay of Islands sits north of Auckland, in the opposite direction from the rest of the trip, so it works best as a self-contained pre-trip. Spend two days at Waitangi Treaty Grounds and the Bay of Islands, then join the group on the Coromandel for Day One.
Skip it, and you won’t miss anything the rest of the trip depends on.
Optional Bay of Islands — 2 days at the start
Everything from Day One onward is the heart of the journey — sixteen days from Hot Water Beach to Auckland across both islands, including two nights to get home. It works on its own as a complete itinerary.
Core journey — 16 days across both islands
Instead of connecting home through Auckland, continue nonstop from Queenstown to Sydney or Melbourne for another two or three days.
Like the Bay of Islands, it’s completely optional.
Optional Australia — 2 or 3 days on the way home
What it costs
Hotels, every activity ticket, the rental cars, fuel and the inter-island flights — everything except food.
For comparison, a comparable seventeen-day escorted tour of both islands runs about $12,000 per person, land only. The admissions alone on this itinerary come to roughly $1,000 a person — Te Pā Tū is NZ$280, Mou Waho NZ$265, Hobbiton NZ$130.
Included
Not included
Worth knowing
It’s an estimate, not a fixed price. Hotel rates move, and the cars, flights and fuel are shared costs that depend on how many of us travel.
I’ve budgeted $200 a person for fuel and we’ll divide the real amount after the trip.
Large vans are available if we’d rather travel together than in separate cars. Dwain has driven on the left many times and is comfortable doing it.
TonightPaihia
New Zealand history in the morning, the Bay of Islands in the afternoon
TonightPaihia
The core journey begins
TonightHot Water Beach
TonightRotorua
TonightRotorua
TonightRotorua
TonightChristchurch
TonightHokitika
TonightHokitika
TonightHaast
TonightWānaka
TonightTwizel
TonightTwizel
TonightTe Anau
TonightTe Anau
TonightAuckland Airport
The itinerary, day by day
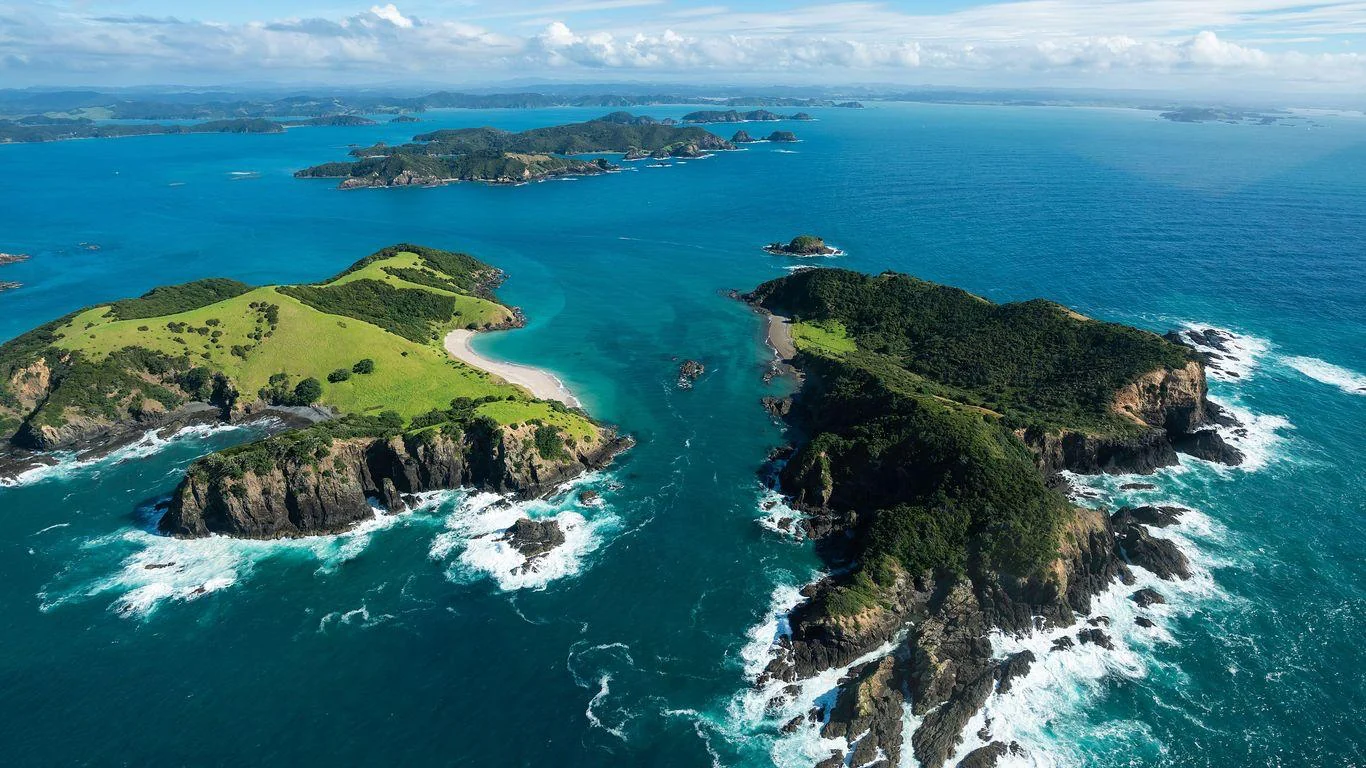 Auckland → Whangārei → PaihiaAbout 3 hr 15 min driving
Pick up the car in Auckland and head north to the Bay of Islands, stopping for lunch at Whangārei’s waterfront Town Basin before continuing to Paihia.
Auckland — arrival
Allow 3 hours from wheels-down
Allow plenty of time for immigration, biosecurity, baggage and the rental-car desk before getting on the road.
Lunch — Whangārei
1 hour
Stop at Whangārei’s Town Basin, a marina with cafés and restaurants along the waterfront. It’s the last substantial town before the Bay of Islands and a good place to have lunch, stretch our legs and take a real break from the drive.
If anyone is tired, this is the place to swap drivers rather than push through.
Paihia — check in
Rest of the afternoon
Paihia is a small waterfront town overlooking the Bay of Islands and the departure point for tomorrow’s boat trip. The beach is right in front of the hotels.
After nineteen hours of travel, the correct plan is to do nothing.
Dinner — Paihia waterfront
About 1½ hours
Have dinner along the waterfront and call it an early night. Everyone will still be running on the wrong clock.
 Waitangi + Bay of IslandsNew Zealand history in the morning, the Bay of Islands in the afternoon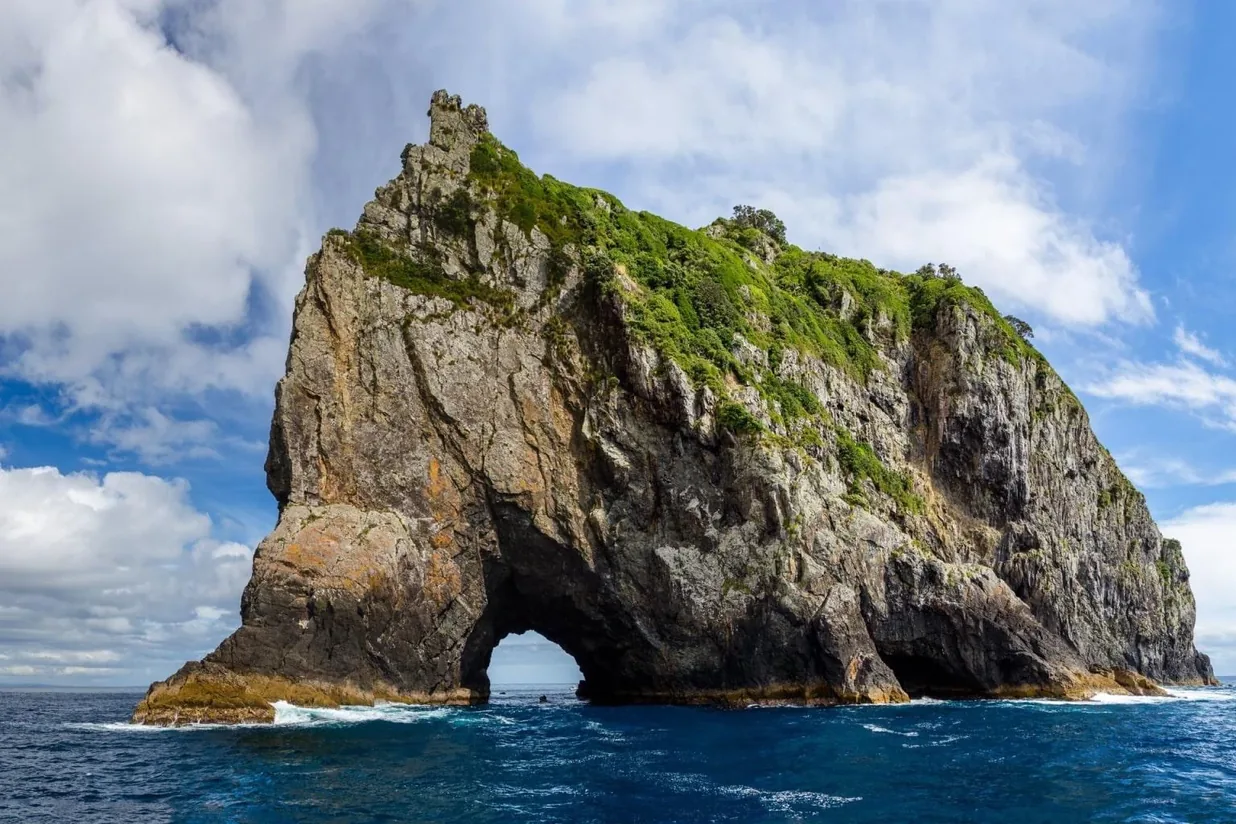
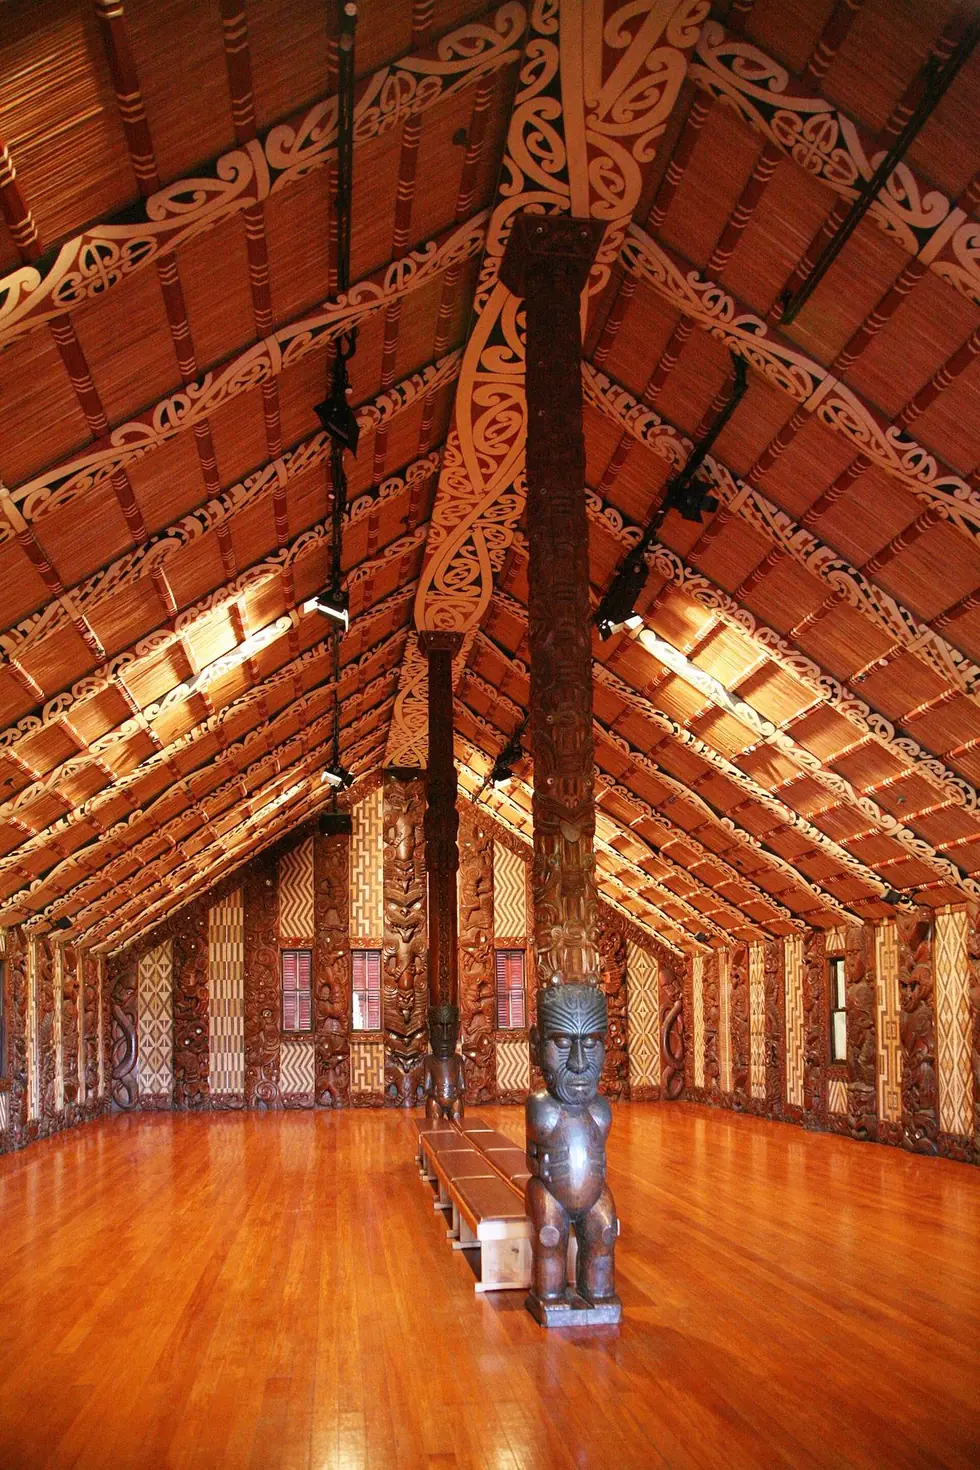
Begin at the Waitangi Treaty Grounds, where the Treaty of Waitangi was first signed in 1840. Explore the historic grounds, carved meeting house, ceremonial waka and museums before returning to Paihia.
In the afternoon, cruise through the Bay of Islands to the Hole in the Rock, passing secluded islands, beaches and dramatic coastal scenery along the way.
Waitangi Treaty Grounds
About 3 hours
This is the most important historic site in New Zealand. The Treaty of Waitangi was first signed here in 1840 between representatives of the British Crown and Māori chiefs, and the differences between the Māori and English versions still shape New Zealand today.
Visit the two museums, the historic Treaty House, Te Whare Rūnanga meeting house and Ngātokimatawhaorua, one of the world’s largest ceremonial waka.
Make time for the guided tour and Māori cultural performance. This is one place where having someone explain what happened — and why the treaty remains important — adds considerably more than simply walking through on our own.
Lunch — Paihia waterfront
About 1 hour
Return to Paihia for lunch near the wharf before the afternoon cruise.
Hole in the Rock cruise
About 3½–4 hours
Head out through the Bay of Islands, weaving among some of its 144 islands before continuing toward Cape Brett and Motukōkako / Hole in the Rock.
The cruise passes secluded bays and islands along the way, with a chance of seeing dolphins and other marine life. If sea conditions allow, the boat passes through the opening in Motukōkako itself.
Paihia
Back in Paihia for the evening. Have dinner along the waterfront and leave the rest of the night open.
Tomorrow morning we turn south for the Coromandel and meet everyone joining for the core trip in Hahei.
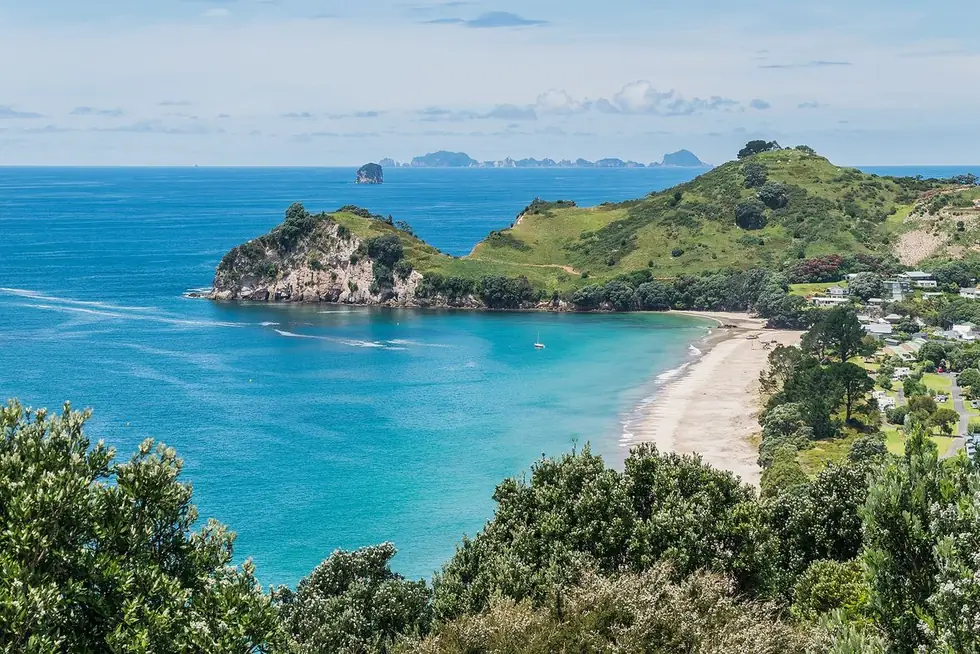 Auckland / Paihia → Hot Water BeachThe core journey begins
The core journey begins today. Those arriving in Auckland pick up the rental van and head east toward the Coromandel. The Bay of Islands group drives south from Paihia, stopping at the Auckland New Zealand Temple before continuing to meet the group.
Cross the Hauraki Plains and Coromandel Peninsula to Hot Water Beach.
If you did the Bay of Islands pre-trip
Paihia → Auckland New Zealand Temple · 143 mi · about 3 hr 15 min
Leave Paihia early and drive south to Auckland.
Everyone begins the trip
Auckland Airport → Auckland New Zealand Temple · About 15 min
After clearing immigration, biosecurity, baggage and collecting the rental car, head to the Auckland New Zealand Temple.
Auckland New Zealand Temple
20 min · grounds only
It’s right on the way. Both groups stop at the Auckland New Zealand Temple. From here, both follow the same route to Hahei and meet there later in the day.
Auckland Temple → Hahei
About 115 mi · 2 hr 40 min driving
Those coming from the Bay of Islands will have about six hours of driving in total today, making this one of the three long driving days of the trip.
Thames — lunch & supplies
Thames → Hahei · about 55 mi · 1 hr 20 min
On the way to Hahei, stop in Thames, an old gold-rush town at the foot of the Coromandel Peninsula with a street of Victorian shopfronts.
It’s also the last full supermarket and last substantial town before Hahei, so this is the place for lunch and anything we need for the next two nights. New World Thames: roast chicken, ham, boiled eggs and cheese for anyone who cannot eat gluten — do not count on a bakery sandwich for her.
Hahei — check in
Hahei is a small beach village on the eastern side of the Coromandel Peninsula. Offshore islands help shelter the bay, making Hahei Beach a good place for a swim after the drive.
If the tide works, head to nearby Hot Water Beach, where geothermal springs push naturally heated water through the sand. For roughly two hours on either side of low tide, you can dig a shallow pool near the waterline and mix the hot spring water with cooler seawater.
The spring water can be extremely hot, and Hot Water Beach has strong rip currents, so this is a place for digging and soaking rather than swimming. If we reach Hahei by 3:00PM, we may catch the bonus tide window at Hot Water Beach. Otherwise, we have another opportunity tomorrow.
Dinner — Hahei village
Three or four places within walking distance, and they fill in January. I’ll reserve dinner in advance.
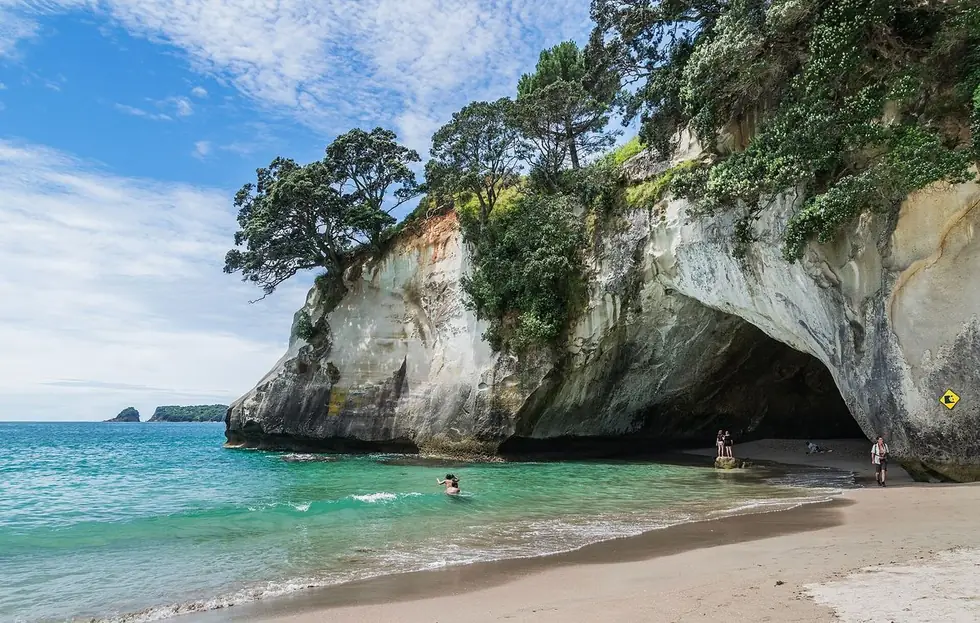 Cathedral Cove + Hot Water Beach12 mi total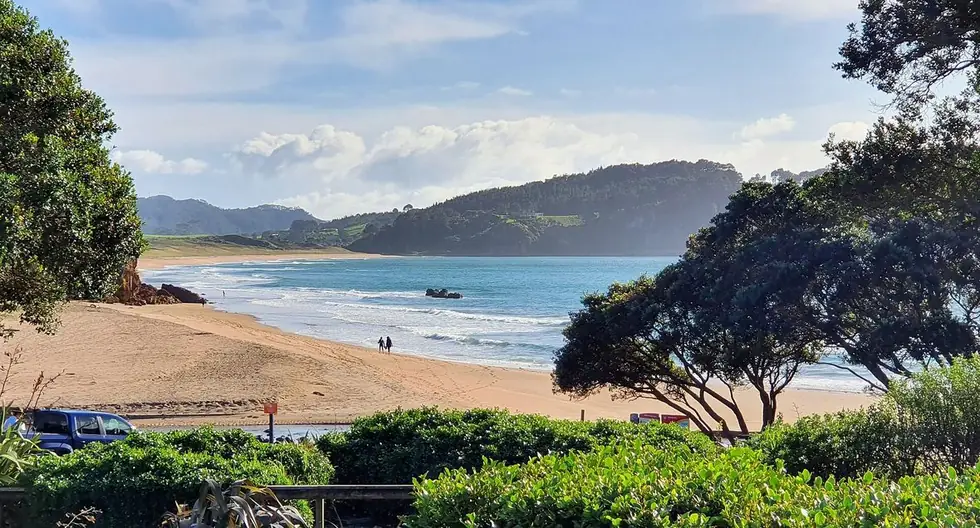
Take the Cathedral Cove Water Taxi from Hahei for views of the Coromandel coastline and time ashore at Cathedral Cove.
Later, head to Hot Water Beach around low tide, where geothermal water rises through the sand. Bring a swimsuit and shoes that can handle wet sand, mud and dirt.
Breakfast
45 min
Cathedral Cove by water taxi
10 min drive · 10 min crossing · ~2h15 ashore
Board the water taxi from Hahei Beach for the short ride along the Coromandel’s dramatic coastline, passing sea caves, cliffs and rock stacks before landing right inside Cathedral Cove.
The centerpiece is the enormous natural arch carved through the limestone headland, opening onto a second beach. We’ll have plenty of time to explore the beaches and cove before heading back to Hahei.
Lunch — Hahei, or picnic on the beach
1 hour
Optional picnic on Hahei Beach after the water taxi, before we dig at Hot Water Beach.
Supplies that morning: Hahei General Store, 46 Hahei Beach Road, opens about 8:30AM — fruit, drinks, simple food. For a proper gluten-free plate (roast chicken, ham, eggs, cheese), use New World Thames the day before, or New World Whitianga (Joan Gaskell Drive, about 25 min, opens 7:00AM) if we need more.
Hot Water Beach
Low tide 2:18PM · digging window ~12:18–4:18PM
One of New Zealand’s most unusual beaches. Around low tide, geothermal springs rise through the sand, allowing us to hire a spade, dig our own pool and soak in naturally heated water just steps from the Pacific.
Some spots can reach 147°F, so the trick is finding the perfect place where cool seawater mixes with the hot spring water.
Don’t swim at Hot Water Beach — strong rips make nearby Hahei the better choice for swimming.
Dinner — Hahei
1½ hours
Both experiences are weather-dependent. We’ll confirm the tide and water-taxi conditions the day before.
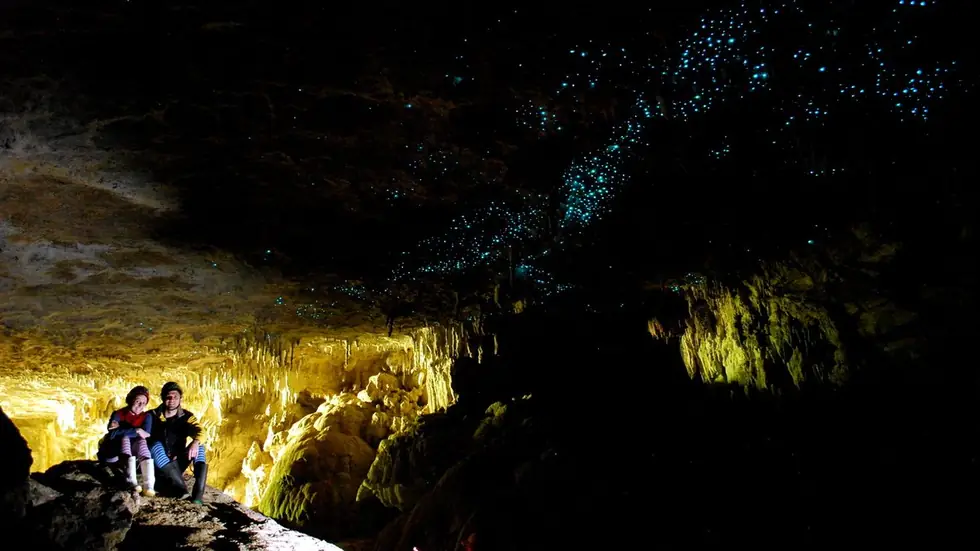 Hot Water Beach → Waikato → Waitomo → Rotorua~240 mi · about 5 hours actual driving · both caves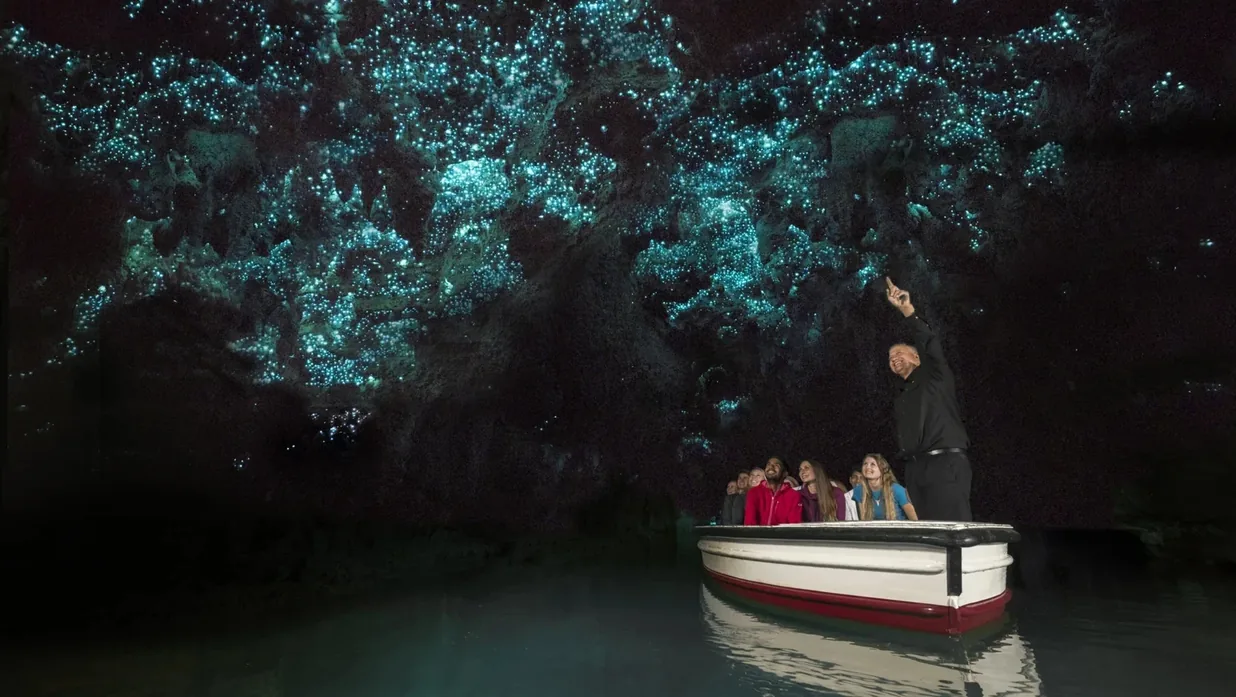
Cross the Coromandel and Waikato on the way south, stopping at the Hamilton New Zealand Temple before continuing to Waitomo.
Experience both the Waitomo Glowworm Caves and the smaller Footwhistle Cave, then continue to Rotorua.
Breakfast, then depart
45 min
Lunch — Hamilton
45 min
A quick lunch before continuing south.
Hamilton New Zealand Temple
15 min · grounds only
A brief stop at the temple, set on a hill above Temple View. A short detour, about 10–15 minutes from town.
Footwhistle Cave
1h15 · private tour · max 11 people
A smaller, more personal glowworm experience. We enter through the forest and explore the cave with our own guide, getting much closer to the glowworms and their delicate silk fishing lines.
There are limestone formations and fossils along the way, and unlike the main Waitomo cave, photography is allowed. With our group size, we could essentially have the cave experience to ourselves.
Waitomo Glowworm Caves
45 min · walk + underground boat ride
This is the classic Waitomo experience and the cave that made the region famous. Walk through impressive limestone chambers to the soaring Cathedral, then board a boat for a silent journey along the underground river.
The boat glides in darkness beneath thousands of tiny glowworms illuminating the ceiling like a night sky. It’s the iconic experience, but also the larger and more commercial of the two. Photography isn’t permitted inside.
Why both?
Because the caves are close together, we can experience both without adding significant driving.
They complement each other well: Footwhistle for the intimate, close-up experience and Waitomo for the famous silent boat ride beneath the glowworm ceiling.
We’ll coordinate the two reservation times in advance.
Rotorua — check in
Rotorua is the heart of New Zealand’s geothermal country, where steam rises from the ground, hot springs bubble and volcanic activity is part of everyday life.
Dinner — Eat Streat
A lively covered restaurant strip in central Rotorua, with paving warmed by geothermal energy beneath the street.
The two caves are about five minutes apart, so both fit in one afternoon — but the times have to be booked together and in this order. Footwhistle is a private tour with a fixed start; the Glowworm Caves run every half hour.
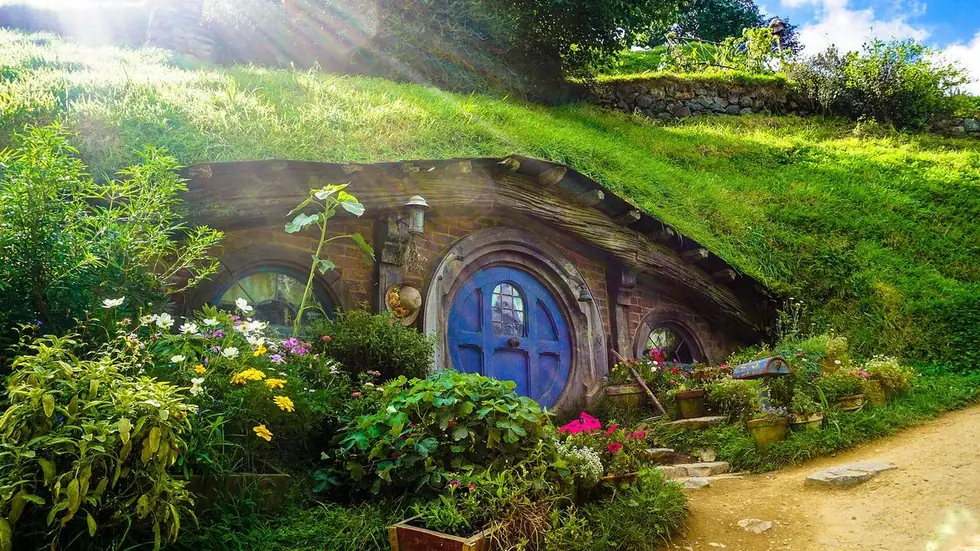 Hobbiton + Te Puia + Te Pā Tū~90 mi · Hobbiton, Te Puia, then the evening at Te Pā Tū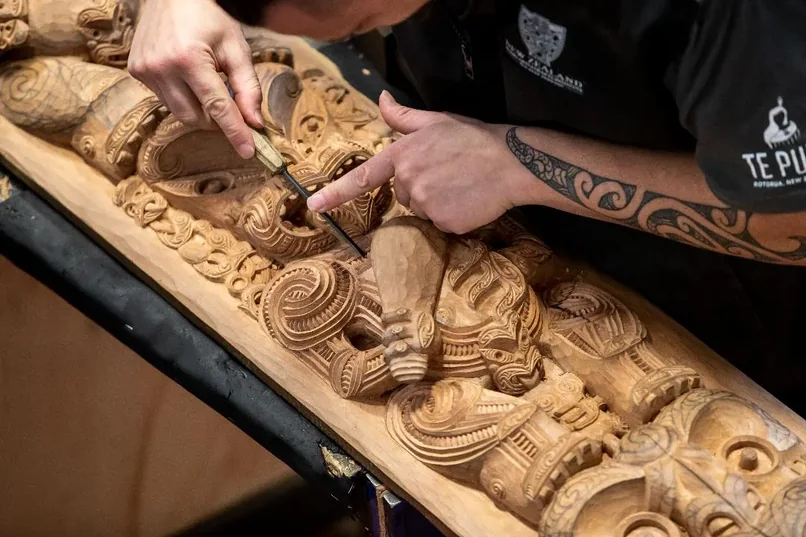
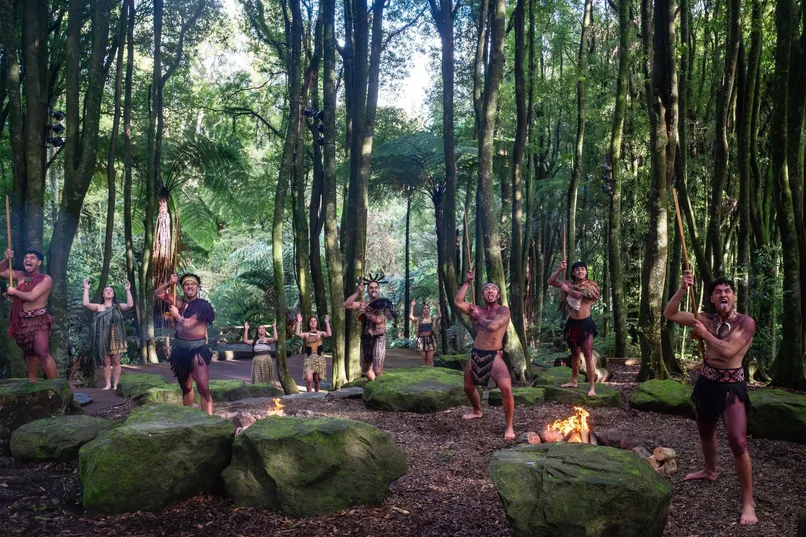
Today brings together three very different sides of New Zealand: the landscapes made famous by Middle-earth, Rotorua’s extraordinary geothermal activity, and an evening immersed in Māori culture.
Begin with the Hobbiton Signature Tour, walking through the Shire, inside a Hobbit home on Bagshot Row and finishing at the Green Dragon Inn.
Back in Rotorua, spend 90 minutes at Te Puia seeing Pōhutu Geyser, bubbling mud pools and the New Zealand Māori Arts and Crafts Institute.
Return to the hotel for a break before the 7:30 PM Te Pā Tū Summer Harvest Celebration, with Māori storytelling, performance and dinner.
Breakfast, then depart
45 min
Hobbiton Movie Set — Signature Tour
2 hrs · guided · easy gravel paths
Step into the Shire, where 44 hobbit holes are tucked into rolling green hills, surrounded by gardens planted and tended year-round.
Originally created for The Lord of the Rings and rebuilt permanently for The Hobbit, the set is extraordinarily detailed — from Bag End and vegetable gardens to washing on the lines. The tour finishes across the mill pond at the Green Dragon Inn with a drink.
The Signature Tour goes inside a Hobbit home on Bagshot Row and finishes with a drink at the Green Dragon Inn.
Lunch — The Shire’s Rest
1 hour
Te Puia — Te Rā
90 min · guided
Our chance to see Pōhutu, the largest active geyser in the Southern Hemisphere, erupting up to 100 feet from Rotorua’s geothermal valley. We’ll also see steaming vents and bubbling mud pools along the way.
Te Puia is also home to the New Zealand Māori Arts and Crafts Institute, where we can see traditional carving and weaving and learn how these skills are being passed to a new generation.
This gives us the geothermal and artistic side of Māori culture without duplicating the cultural evening ahead.
Return to hotel
About 2½ hours free
Time to change, rest and eat something light if anyone wants it — dinner tonight is part of Te Pā Tū and does not begin until well after 8:00PM.
Hotel pickup for Te Pā Tū
Transport included
Te Pā Tū collects us from the hotel, so no one drives tonight. Pickup times are confirmed at booking and are usually about 45 minutes before the experience begins.
Te Pā Tū — Summer Harvest Celebration
~3½ hrs · dinner included
Tonight is our deeper immersion into Māori culture, set among native forest outside Rotorua.
The evening begins with a traditional pōwhiri welcome before moving through the forest for storytelling, song, poi, haka and other traditions.
Dinner incorporates hāngī, the traditional method of cooking with heated stones beneath the earth, as part of a multi-course feast. The experience follows the maramataka — the Māori lunar calendar — so the stories, food and activities change with the season.
Hotel pickup and return means no driving tonight.
Why both?
Te Puia and Te Pā Tū give us two very different experiences. At Te Puia, the focus is Pōhutu Geyser, the geothermal valley and traditional Māori arts. Te Pā Tū is about culture, storytelling, performance and food in an atmospheric forest setting.
Doing both means we don’t have to choose between seeing Pōhutu naturally erupt and having the stronger Māori cultural evening.
Book first: Hobbiton sells out well ahead in January, so secure that time first. Te Pā Tū should also be reserved early — the 7:30PM Summer Harvest Celebration is the one we want.
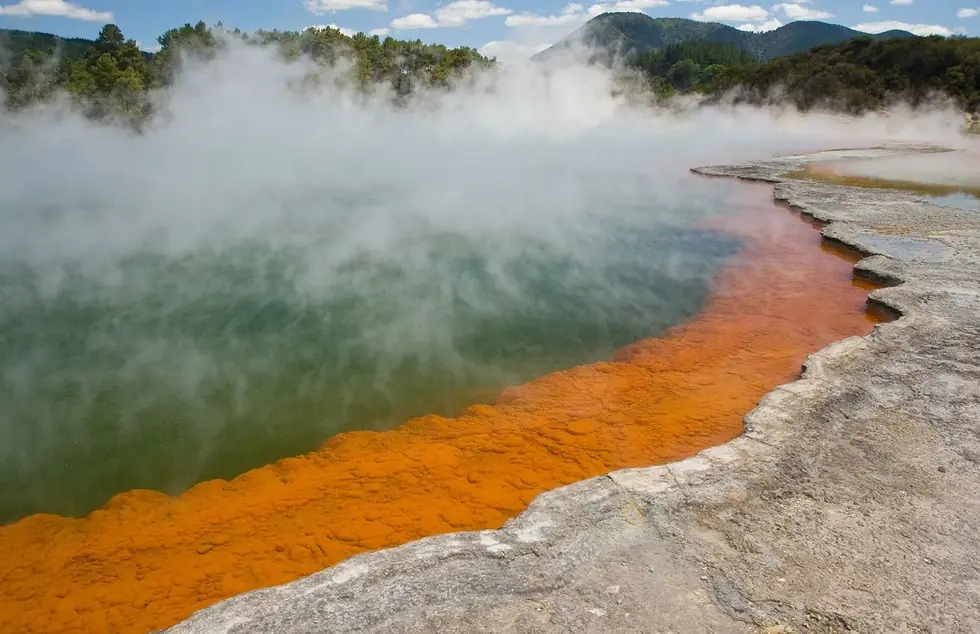 Rotorua’s Geothermal Corridor45 mi · every stop within 10 miles of the last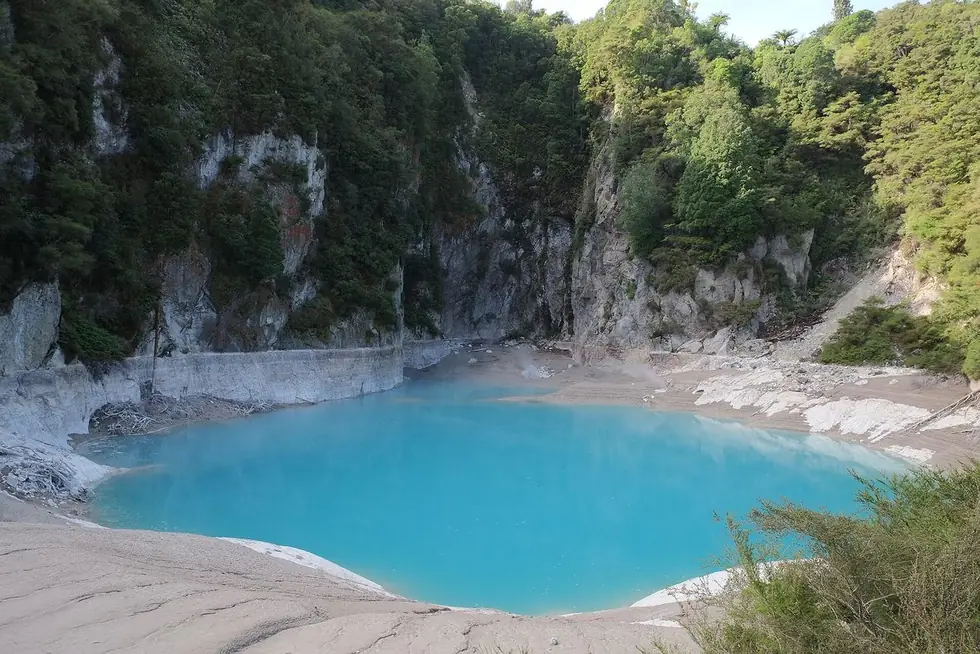
Walk through Waimangu Volcanic Valley and cruise Lake Rotomahana, then continue to Wai-O-Tapu for Champagne Pool, Artist’s Palette and other geothermal features.
Finish with a soak at Waikite Valley Thermal Pools, fed by natural geothermal water.
Breakfast
45 min
Waimangu Volcanic Valley — Full Experience
~4 hrs · downhill walk + Lake Rotomahana cruise
Waimangu is the youngest geothermal system on Earth, created on 10 June 1886 when the eruption of Mount Tarawera tore open the landscape. Everything we see here — the craters, hot springs and recovering forest — has developed since that eruption.
The trail descends through the valley to Frying Pan Lake, the largest hot spring in the world, a vast expanse of steaming water. Nearby, Inferno Crater is completely different: an intensely blue lake whose water mysteriously rises and falls on a roughly 38-day cycle.
The walk continues downhill to Lake Rotomahana, where we’ll take a 45-minute cruise past steaming cliffs and geothermal vents. Beneath the lake lie the remains of the legendary Pink and White Terraces, enormous silica formations once considered one of the natural wonders of the world before the 1886 eruption destroyed or buried them.
The walk is downhill, with a shuttle back to the entrance.
Lunch — Waimangu Café
45 min
Lunch overlooking the volcanic valley before the short drive to Wai-O-Tapu.
Wai-O-Tapu Thermal Wonderland
~1½ hrs · boardwalk
Waimangu is about scale and volcanic power. Wai-O-Tapu is about color.
The star is the Champagne Pool, a huge steaming crater lake surrounded by a brilliant orange mineral rim. Its overflow spreads across the Artist’s Palette, where different minerals create streaks of orange, green, yellow and rust.
Then there’s Devil’s Bath — an almost impossibly vivid yellow-green pool that hardly looks natural.
The Champagne Pool is a must-see, so Wai-O-Tapu stays in the plan even if we’re running behind.
Waikite Valley Thermal Pools
Open-ended · last entry 7:00PM
After spending the day looking at geothermal water, we finally get into it.
The pools are fed by Te Manaroa Spring, the largest single source of naturally boiling water in New Zealand. Water emerges at around 210°F, then is cooled naturally before flowing into a series of soaking pools ranging from roughly 95–104°F.
No chemicals are added to the thermal water, and a short trail leads directly to the steaming spring that feeds the pools.
There’s no schedule once we arrive. Soak as long as we like.
Dinner
Eat at Waikite or make the ~30-minute drive back into Rotorua for dinner.
Keeping the day flexible
This is a full day, but the most flexible part comes at the end. Waimangu and Wai-O-Tapu are the priorities; Waikite is open-ended, so there’s no need to rush through the earlier stops just to hit an exact spa time.
If we’re tired by Wai-O-Tapu, shorter walking routes still take us past the Champagne Pool and Artist’s Palette.
Lady Knox Geyser. Its scheduled eruption is artificially induced by dropping in soap; we will have already seen Pōhutu Geyser naturally at Te Puia the day before.
Geothermal safety: In natural geothermal water, keep your head above the surface and avoid getting water up your nose.
Fly nonstop from Rotorua to Christchurch on Air New Zealand NZ5785, 12:17 PM–1:51 PM. Pick up the South Island van and spend the afternoon and evening exploring central Christchurch.
Breakfast
1 hour
An unhurried morning — the flight is not until midday.
Check out and pack the car
Last chance for anything left in the room. Fuel the car before the airport.
Rotorua Airport
Return the rental car · allow about 1 hour
Rotorua has a small regional airport just outside town, making this a much simpler departure than Auckland. They are strict on checked baggage being 23 kg (about 50 lb) per bag.
Arriving about 1h45 before departure leaves room for the car return and a relaxed check-in.
Rotorua → Christchurch
Air New Zealand NZ5785 · 1h34 · nonstop
Arrives Christchurch 1:51PM, which leaves the whole afternoon free.
The route uses small regional turboprops with limited departures, so with 8–10 of us traveling together we’ll want to book early.
Christchurch — collect the South Island van
Allow about 45 min
The rental desks are a short walk from the terminal.
Christchurch — check in
Afternoon free
Explore the Botanic Gardens, wander through central Christchurch and the cathedral precinct, stop at Riverside Market— or simply relax before tomorrow’s drive west.
Dinner — Christchurch
1½ hours
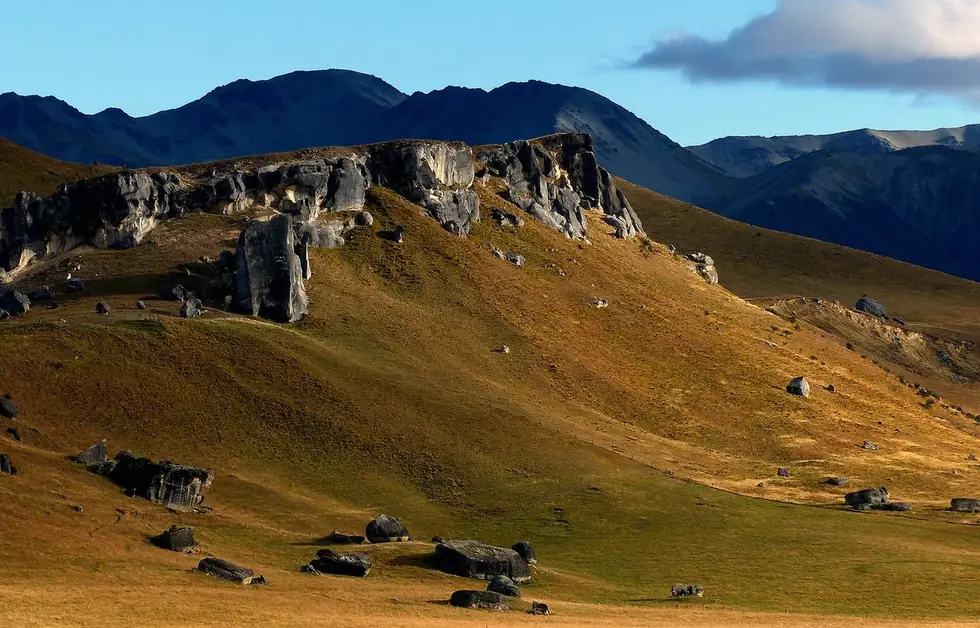 Christchurch → Castle Hill → Arthur’s Pass → Hokitika~155 mi · about 3½–4 hrs actual driving · leave at 9:00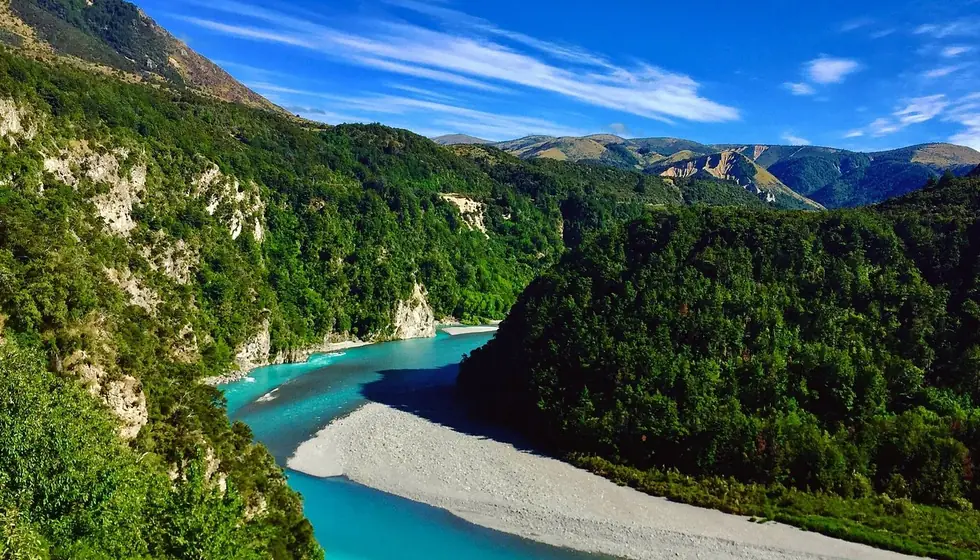
Cross the Southern Alps to the West Coast, stopping among the limestone formations of Castle Hill / Kura Tāwhiti and in Arthur’s Pass before descending to Hokitika.
Breakfast
45 min
Depart Christchurch
Castle Hill / Kura Tāwhiti
60–75 min, or longer if we picnic
An extraordinary high-country landscape where enormous weathered limestone boulders rise from open golden tussock, with the Southern Alps behind them.
A short, easy walk takes us right among the formations, sculpted by water and weather over millions of years.
Optional picnic here instead of a café lunch in Arthur’s Pass. Bring a rug. There is no shop at Castle Hill.
Supplies that morning: New World Durham Street, a few blocks from Cathedral Square, opens 7:00AM; or New World Ilam on Peer Street, Upper Riccarton, opens 7:30AM, on the road west. Sandwiches from the bakery counter; roast chicken, ham, boiled eggs and cheese for anyone who cannot eat gluten. Sheffield Pie Shop is on SH73 if we only want ready-made pies — not gluten-free.
Arthur’s Pass — lunch, if we did not picnic
60–75 min
The road climbs across the dramatic Otira Viaduct, curving high above a steep mountain gorge before reaching Arthur’s Pass.
Keep an eye out for kea — the world’s only alpine parrot. They’re exceptionally intelligent, curious and notorious for investigating parked cars with their powerful beaks. Enjoy them, but don’t feed them.
Hokitika — check in
Hokitika was one of the great West Coast gold-rush towns, built beside a river port that brought thousands of miners to the region in the 1860s. Today the town sits between the Southern Alps and the Tasman Sea and is particularly associated with pounamu — New Zealand greenstone.
Walk down to the beach before dinner. If the weather cooperates, this is a good place to watch the sun set directly over the Tasman Sea.
Dinner — Hokitika
1½ hours
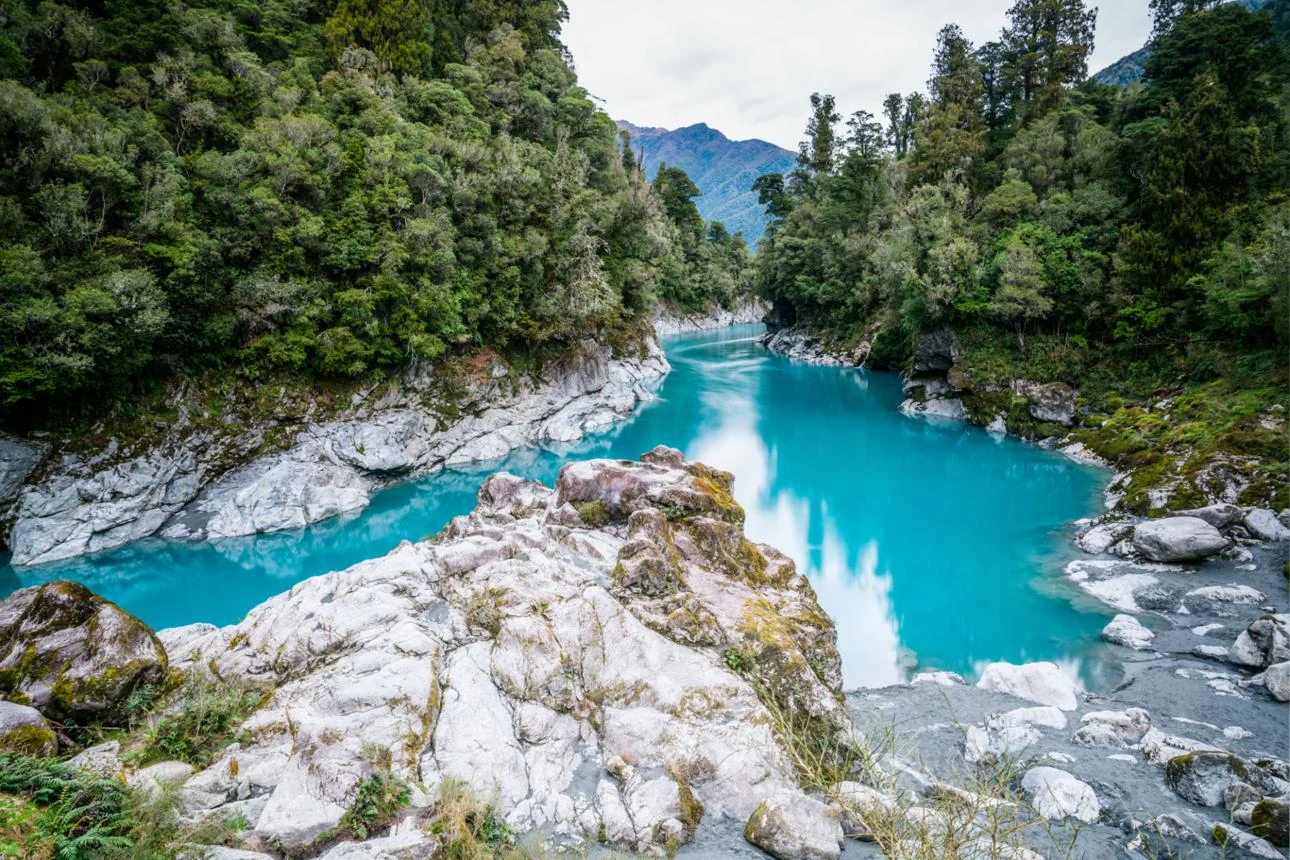 Hokitika Gorge + Lake KaniereA stay-put day · about 1½ hrs of local driving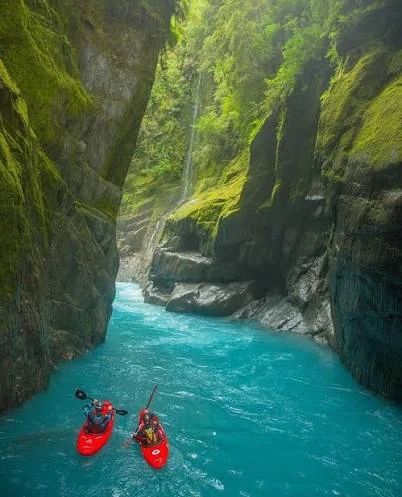
See the vivid turquoise water of Hokitika Gorge, then continue to Lake Kaniere and Dorothy Falls. Spend the afternoon in Hokitika and visit the Glow Worm Dell after dark.
Breakfast
45 min
Hokitika Gorge
~1½ hrs · easy loop
The Hokitika River runs out of the Southern Alps through dense West Coast rainforest, carrying fine glacial sediment that can turn the water an extraordinary turquoise-blue.
The full loop is only 1.6 km and crosses two suspension bridges, including a 90-metre bridge over the main channel. Shorter viewpoints are only minutes from the car park, so everyone can decide how much of the loop to do.
The colour depends on the weather. After heavy rain the river can turn grey with sediment; in clearer conditions it can look almost unreal.
If we can arrange it — a short kayak through the gorge
Replaces the walk, not added on top
West Coast Packrafting can run bespoke trips. We will ask for a short scenic kayak on the lower gorge — on the turquoise water, Class I–II, not their full whitewater day with the rapids above the gorge.
If they can do that for the group, we paddle instead of walking. If they cannot, or the river is too high after rain, we walk the loop. Either way we see the gorge.
Lunch — picnic at the gorge, or back in Hokitika
About 1 hour
Optional picnic at the Hokitika Gorge car park after the walk or kayak. Tables are usually there.
Supplies that morning: New World Hokitika, 116 Revell Street, before we leave town. Bakery sandwiches for most of us; roast chicken, ham, eggs and cheese for anyone who cannot eat gluten. Do not wait to shop after the gorge — it is a 30–40 min drive back to town.
Lake Kaniere & Dorothy Falls
About 1 hour
A short drive inland to a forest lake, then a few minutes on foot to Dorothy Falls. Easy, local, and a completely different West Coast from the gorge.
Hokitika — pounamu and town
Hokitika is particularly associated with pounamu, New Zealand greenstone. Walk the main street, look into the galleries, and leave time for the beach.
Tasman Sea sunset
The beach is a few minutes from town. If the weather cooperates, the sun sets directly over the Tasman Sea.
Glowworm Dell — optional
About 20 min after dark · 5 min from town
A short bush path just outside Hokitika, free, and easy to skip if people are ready to call it a night.
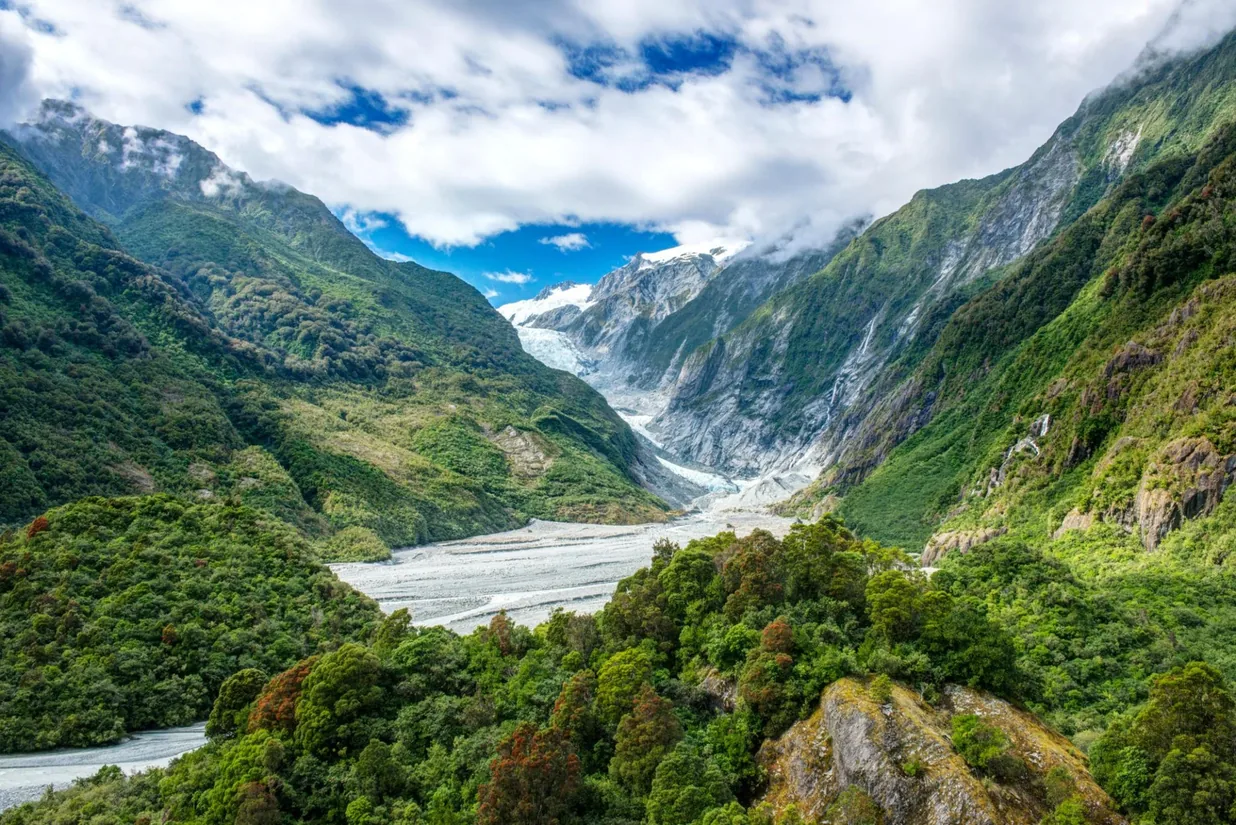 Hokitika → Franz Josef → Haast~190 mi · about 4 hrs actual driving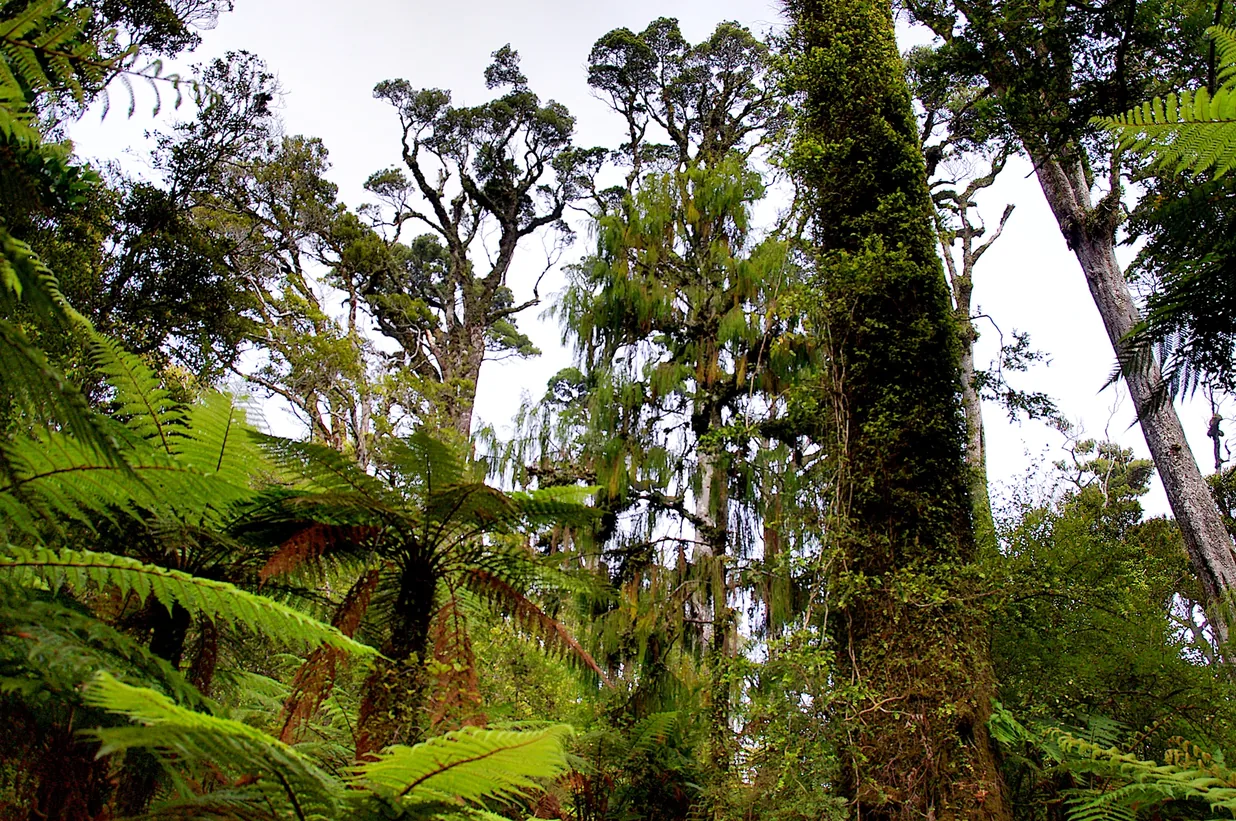
Follow the wild West Coast south through rainforest and glacier country. Stop at Franz Josef, Bruce Bay and Ship Creek before continuing to remote Haast.
Breakfast, then depart
A reasonable hour — nothing is booked today
Franz Josef
On the highway · stretch / lunch if we want it
Franz Josef township sits on SH6. We can stop for a view or a coffee, then keep going. We are not turning off to a glacier. The ice we came for is the Tasman lake at Mount Cook.
Bruce Bay
15–20 min
A long, empty curve of Tasman Sea. Driftwood, surf, and almost no town.
Ship Creek
20–30 min · short boardwalks
Two short walks from the same car park — one to the beach, one into kahikatea swamp forest. A good last stop before Haast.
Haast — check in
Haast sits within the vast Te Wāhipounamu Southwest New Zealand World Heritage Area, where rainforest, rivers and mountains remain remarkably undeveloped.
Dinner — Haast
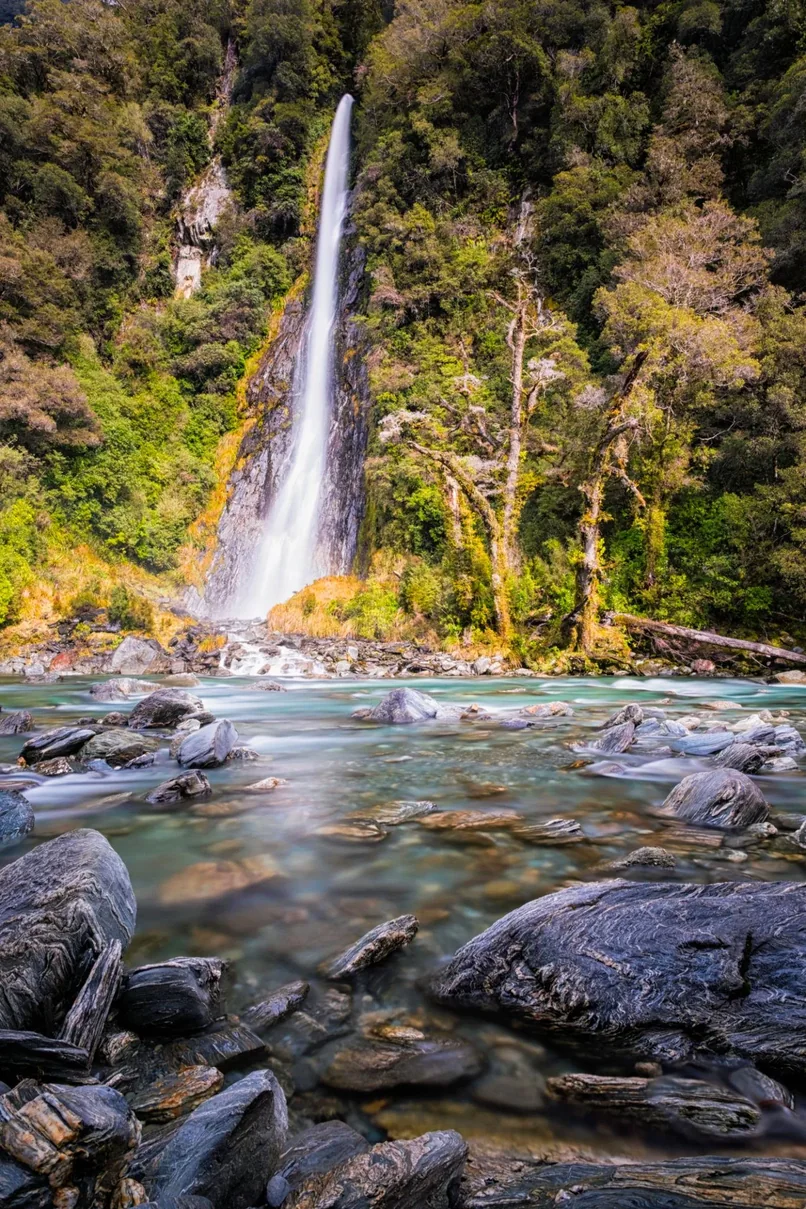 Haast → Haast Pass → Wānaka~90 mi · about 2h15 actual driving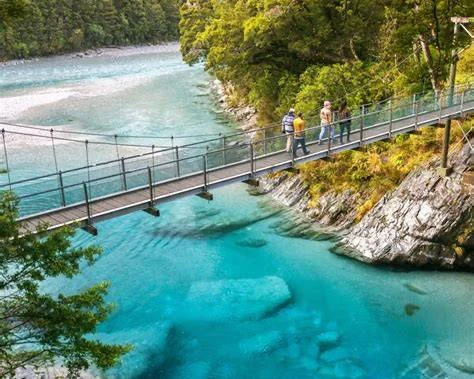
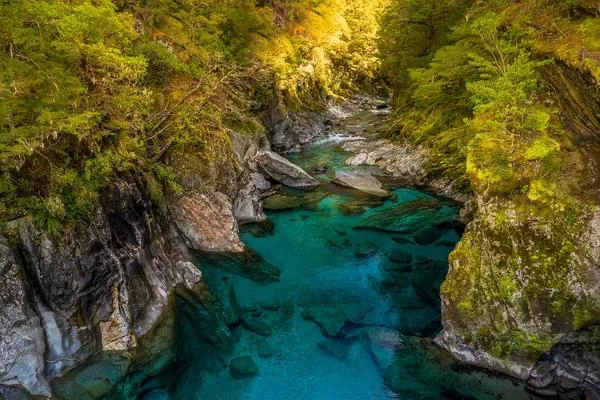
Cross Haast Pass, stopping at Thunder Creek Falls, Gates of Haast and the Blue Pools, before emerging beside Lake Hāwea and continuing to Wānaka.
Breakfast
45 min
Depart Haast
Thunder Creek Falls
15–20 min · very short walk
A short path through native forest leads to the viewpoint across the Haast River, where Thunder Creek Falls drops about 28 metres from the mountainside into the glacier-fed valley.
Gates of Haast
10–15 min
The broad Haast River suddenly compresses into a narrow rocky gorge, exploding through enormous boulders beneath the bridge. It is a quick stop, but it shows just how powerful these alpine rivers become.
Blue Pools / Makarora
Allow about 1 hr if open and conditions are good
The track runs through mature beech forest to swing bridges above exceptionally clear water flowing into the Makarora River.
There is no boat waiting for us today, so this stop can take as long as it deserves. If parking, weather or a track closure is working against us, we keep moving.
Then the landscape changes completely. Dense West Coast rainforest gives way to the drier eastern side of the Alps.
Lake Hāwea
15–20 min
The first of the big alpine lakes. A short lookout stop before the last stretch into Wānaka.
Wānaka — check in
Mid-afternoon, with the rest of the day on the lakefront.
Wānaka lakefront
Walk the flat lakeside path to That Wānaka Tree, the solitary willow growing from the lake that has become one of New Zealand’s most photographed landmarks, or simply wander the waterfront.
Optional picnic on the grass by the lake. New World Three Parks (Sir Tim Wallis Drive) is the full supermarket — bakery sandwiches, plus roast chicken, ham, eggs and cheese. Also the place to pack food for tomorrow’s Lake Pukaki stop. Twizel has a Four Square for the Mount Cook picnic the day after.
Dinner — Wānaka
1½ hours
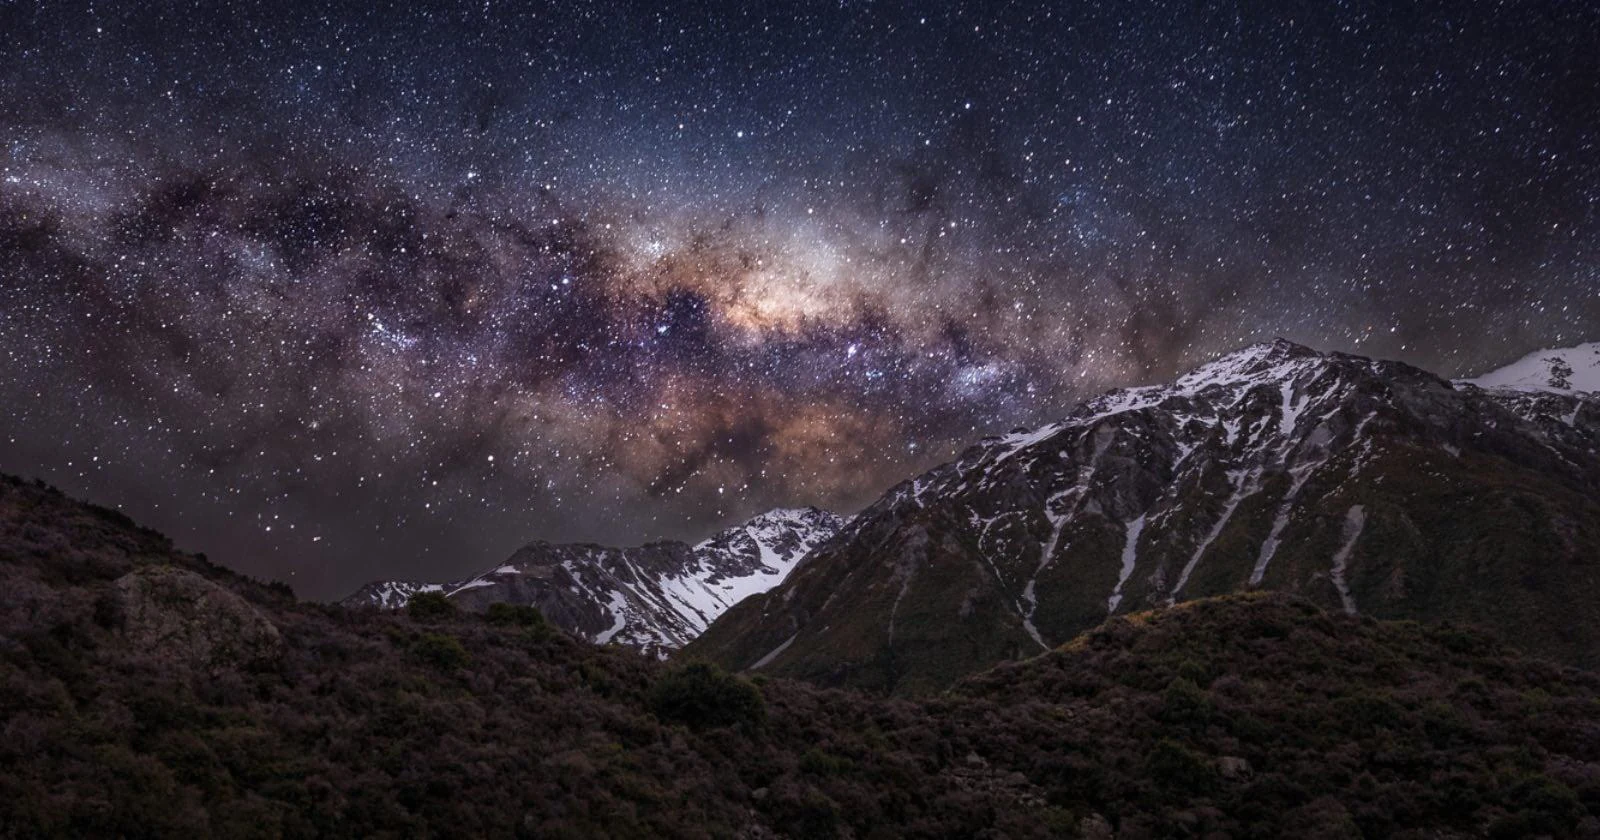 Wānaka → Mou Waho → Lake Pukaki → TwizelMou Waho 9:00–1:00 · then ~140 mi · about 2h40 driving
Take a boat across Lake Wānaka to Mou Waho Island, a predator-free reserve with a remarkable lake hidden above Lake Wānaka itself.
After returning to Wānaka, continue east toward the brilliant turquoise water of Lake Pukaki and the Southern Alps, then continue to Twizel.
After dark, step outside beneath some of the clearest night skies in New Zealand.
Mou Waho Island
9:00–about 12:30–1:00 · boat + guided nature walk
Cruise out across Lake Wānaka to Mou Waho, a predator-free island sanctuary reached only by boat.
The walk climbs through regenerating native vegetation to Arethusa Pool — a lake on an island in a lake. From there, those who want to can continue higher for a remarkable view over the small lake, enormous Lake Wānaka and the Southern Alps beyond.
The island is also home to buff weka, a flightless native bird that disappeared from mainland New Zealand more than a century ago but survives here.
Lunch — Wānaka, or pack a picnic
About 45 min
If we want to picnic at Pukaki, shop now. New World Three Parks, Sir Tim Wallis Drive. Bakery sandwiches; roast chicken, ham, boiled eggs and cheese for anyone who cannot eat gluten.
Tomorrow’s Hooker Valley picnic can wait — Twizel has a Four Square, so we can buy that in the morning.
Depart Wānaka
East through Tarras and over the golden tussock of the Lindis Pass, then down through Omarama into the Mackenzie Basin.
Lake Pukaki lookout
20–30 min, or longer if we picnic
One of the great views of the trip. Glaciers grind rock into an extremely fine powder called rock flour; suspended in the water, it gives Lake Pukaki its extraordinary turquoise-blue color.
On a clear day, Aoraki / Mount Cook rises at the head of the lake, and the road ahead follows the shoreline directly toward it.
Optional picnic at a Pukaki pull-off or Peters Lookout. There is no shop on this stretch. Food has to come from Wānaka.
Twizel — check in
Twizel was built in the 1960s to house workers on the Upper Waitaki hydro scheme and stayed on as the service town for the Mackenzie Basin. It is our base for the next two nights.
It sits about 40 minutes from Aoraki / Mount Cook, which is where we spend tomorrow. No Hooker Valley tonight — that walk is tomorrow, after Glacier Explorers.
Dinner — Twizel
1½ hours
The night sky — if clear
If the sky is clear tonight, use it. We have a second night as insurance rather than a reason to wait.
Twizel sits inside the Aoraki Mackenzie International Dark Sky Reserve, the same protected sky we would have had at Mount Cook Village. Walk away from the streetlights and the difference disappears.
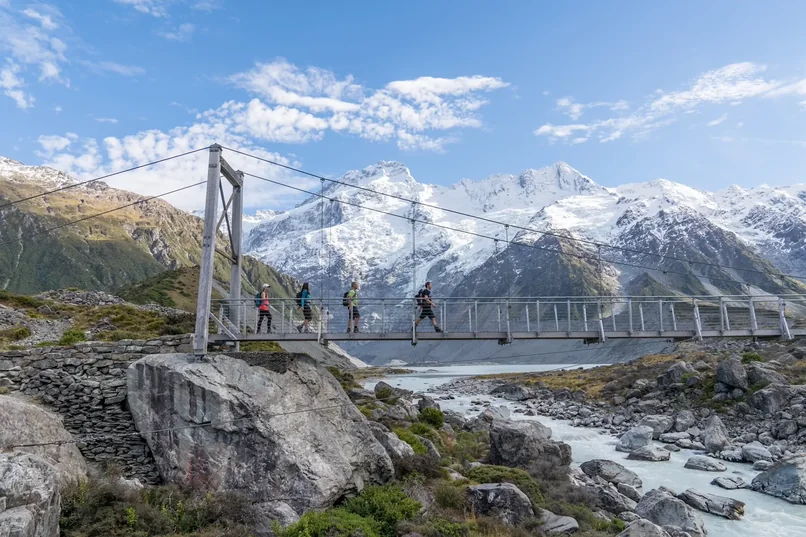 Twizel → Aoraki / Mount Cook → Twizel~80 mi round trip · about 1h40 driving · Glacier Explorers, then the Hooker Valley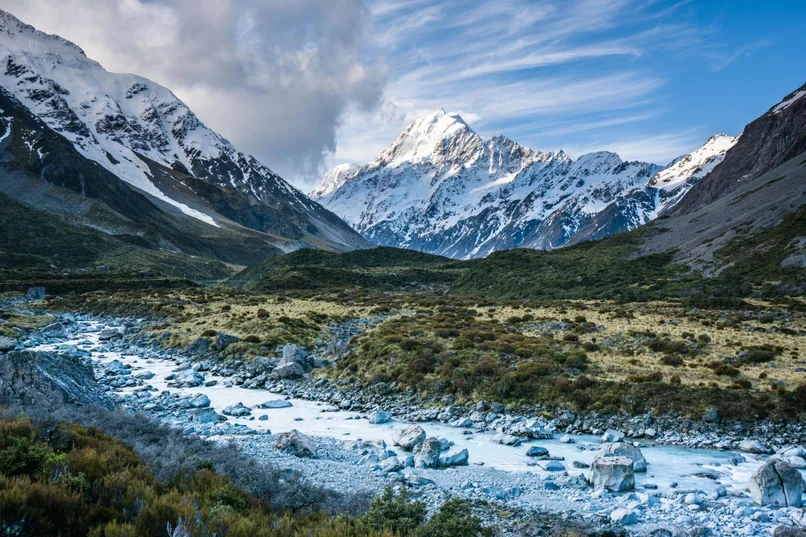
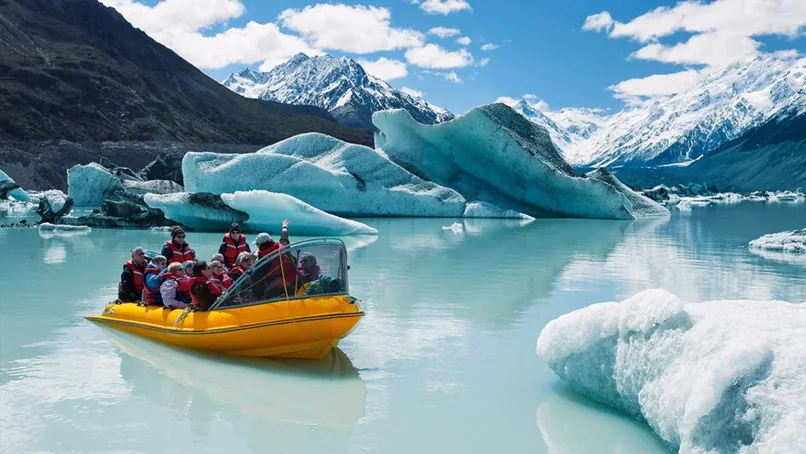
Drive beside Lake Pukaki to Aoraki / Mount Cook for Glacier Explorers, cruising the Tasman Glacier terminal lake among icebergs beneath the Southern Alps.
Afterward, walk the Hooker Valley Track for some of the best views of Aoraki / Mount Cook. Add Kea Point only if time allows.
Return to Twizel and look for the Milky Way beneath the Aoraki Mackenzie International Dark Sky Reserve.
Breakfast — Twizel
45 min
Depart Twizel
Pick up lunch at the Twizel Four Square on the way out. There is no supermarket at Mount Cook Village — only the hotel and a small store.
The road runs the length of Lake Pukaki with Aoraki ahead of us the whole way. It is one of the best drives of the trip and we do it twice today.
Aoraki / Mount Cook — arrive
Check in for Glacier Explorers
Glacier Explorers checks in at the Hermitage hotel in the village — the departure point, not where we are staying.
Glacier Explorers — Tasman Glacier Lake
~2½ hrs · take the earliest departure
The Tasman is New Zealand’s largest glacier. A shuttle takes us up the valley, followed by a 30-minute walk across the glacial moraine to the lake.
From there, small custom boats, ten to twelve people each, take us out among icebergs, some the size of a house and most of their bulk invisible beneath us.
Conditions permitting, the guides lift ice out of the lake and hand it to us — snow that fell several hundred years ago, compressed until it is almost perfectly clear.
Lunch — village, or picnic at White Horse Hill
1 hour
Optional picnic at White Horse Hill, the Hooker Valley car park and campground, about five minutes from the village. Several tables and a shelter; views of Mount Sefton.
Supplies come from the Twizel Four Square this morning.
Hooker Valley Track
Walk as much or as little as we like
One of New Zealand’s great alpine walks, following the Hooker Valley directly toward Aoraki / Mount Cook, the country’s highest mountain.
The trail passes Mueller Lake and crosses the glacial Hooker River on suspension bridges, with Kakīroa / Mount Sefton towering above the valley. The new second swing bridge, opened in July 2026, stretches 189 metres across the river and is New Zealand’s longest suspension bridge.
Hooker Valley — go as far as you like
It’s an out-and-back on the same track, so everyone can start together and turn around whenever they want. The biggest payoff — Hooker Lake with Aoraki beyond — comes at the very end.
The best short version: Go at least to the first suspension bridge. In only about 40 minutes return, we’ll see Mueller Glacier Lake and Mount Sefton and cross the Hooker River. That’s a genuine taste of the Hooker Valley without committing to the full walk.
The full walk: About three hours return. It’s long rather than particularly strenuous — mostly formed track and boardwalk with relatively little elevation gain. The reason to go all the way is Hooker Lake: that’s where we get the classic view of the glacial lake with Aoraki rising beyond.
Shorter alternative — Kea Point: About one hour return from the same general area, ending at a viewing deck overlooking Mueller Glacier Lake, Mount Sefton, The Footstool and Aoraki. No suspension bridges, and an excellent choice if the weather changes or someone wants a shorter walk.
Depart Aoraki / Mount Cook
Back down the lake. Late afternoon light on the Southern Alps is often better than the morning’s.
Twizel
Dinner — Twizel
1½ hours
An earlier dinner tonight. There’s something worth staying up for.
The night sky
As long as we last
Twizel sits inside the Aoraki Mackenzie International Dark Sky Reserve, more than 4,300 square kilometres of protected night sky with extraordinarily little artificial light. The reserve covers the whole Mackenzie Basin, not just the national park, so staying in Twizel costs us nothing here.
Early-February sunsets come around 9:00PM, with true darkness later. Once our eyes adjust, a clear night can reveal the Milky Way stretching across the sky, the Southern Cross and the Magellanic Clouds.
We don’t need to go far. Walk to the edge of town away from the streetlights, give our eyes 15–20 minutes to adjust, and look up.
Guided stargazing with telescopes runs from both Twizel and Lake Tekapo if we want something more structured.
Bring a warm layer — nights can be surprisingly cold even in summer.
Mountain weather can change quickly. Kea Point gives us a much shorter outdoor option, while the Sir Edmund Hillary Alpine Centre is the indoor fallback.
Glacier Explorers has not opened February 2027 bookings yet. It stays in the plan; we book it as soon as inventory appears.
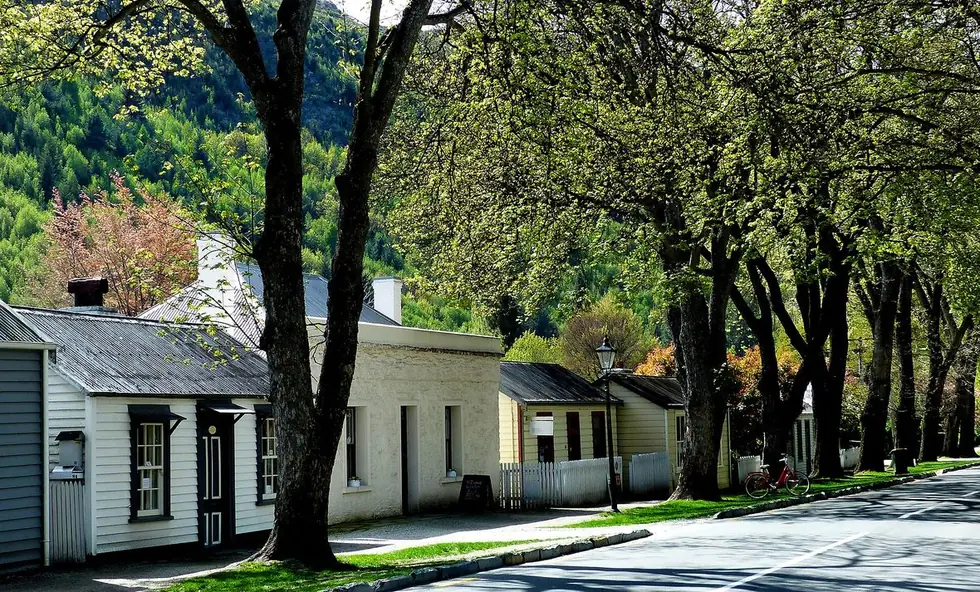 Twizel → Cromwell → Arrowtown → Te Anau~208 mi · about 4h30–4h50 actual driving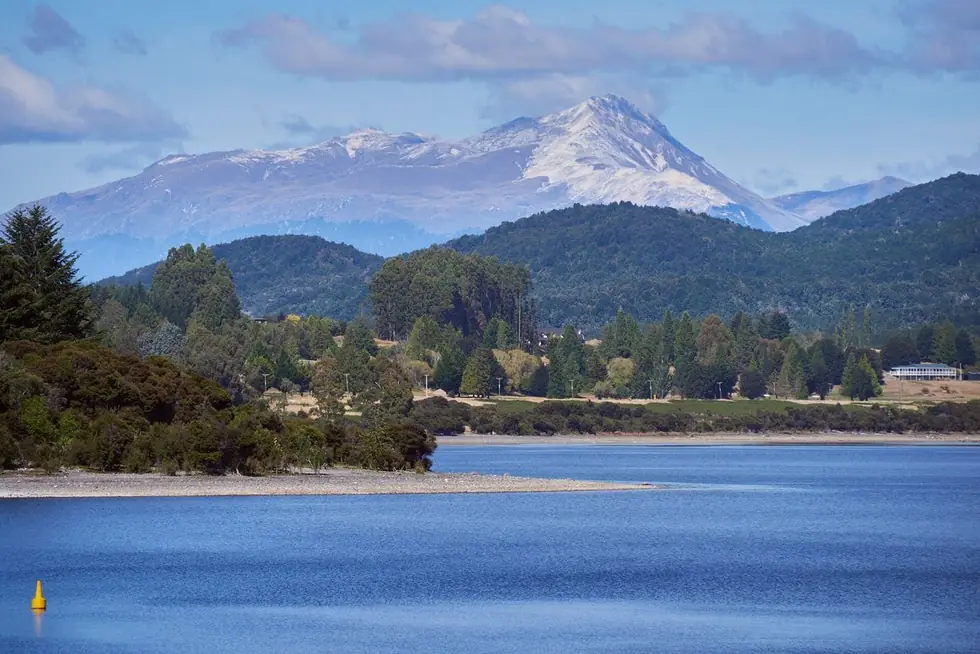
Leave Twizel and head south through Central Otago, stopping in Cromwell and historic Arrowtown before continuing through the Queenstown area to Te Anau.
Breakfast — Twizel
45 min
Depart Twizel
South through Omarama, back over the Lindis Pass and down into Central Otago. Starting from Twizel rather than Mount Cook Village takes about 50 minutes off this day.
Cromwell — fruit stop
About 25 min
Cromwell sits at the meeting of the Clutha and Kawarau rivers, in the middle of Central Otago’s stone-fruit country. Early February is peak season for cherries, apricots and nectarines, sold from stalls on the way into town.
Arrowtown — lunch
About 1½ hours
Have lunch here rather than Cromwell, then walk the historic main street and, if people want, down toward the Arrow River.
Arrowtown was established during the 1860s Central Otago gold rush. The preserved centre gives us something we do not get elsewhere on this part of the trip.
Depart Arrowtown
Te Anau — check in
Te Anau sits on the eastern shore of its enormous namesake lake and is the gateway to Fiordland. Tomorrow we follow the only road into Milford Sound.
Fuel the cars and pick up anything we want for the road before dinner.
Optional picnic on the lakefront if people still want to eat outside after the drive. New World Te Anau is the supermarket: bakery sandwiches; roast chicken, ham, eggs and cheese for anyone who cannot eat gluten. Do not plan a sit-down picnic at Milford tomorrow — sandflies, and the day is already timed around the 10:30AM cruise.
Dinner — Te Anau
1½ hours
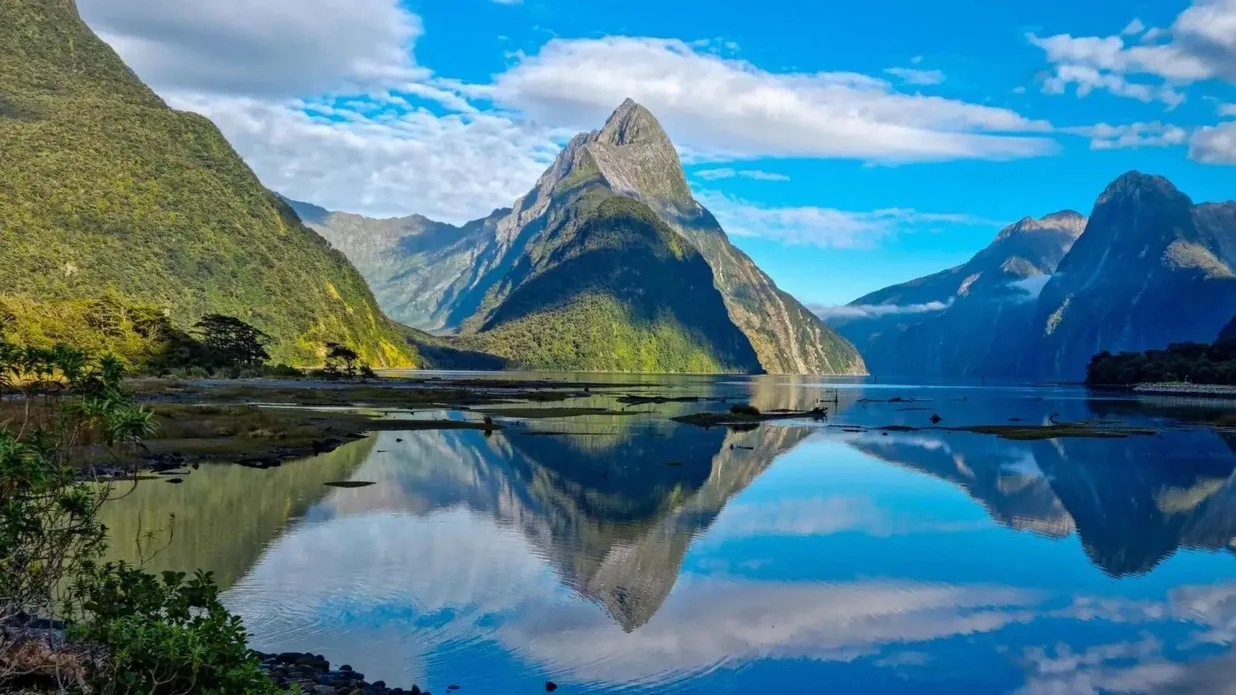 Te Anau → Milford Sound → Te Anau10:30AM cruise · ~150 mi round trip · about 2½ hrs each way, or 3 hrs with stops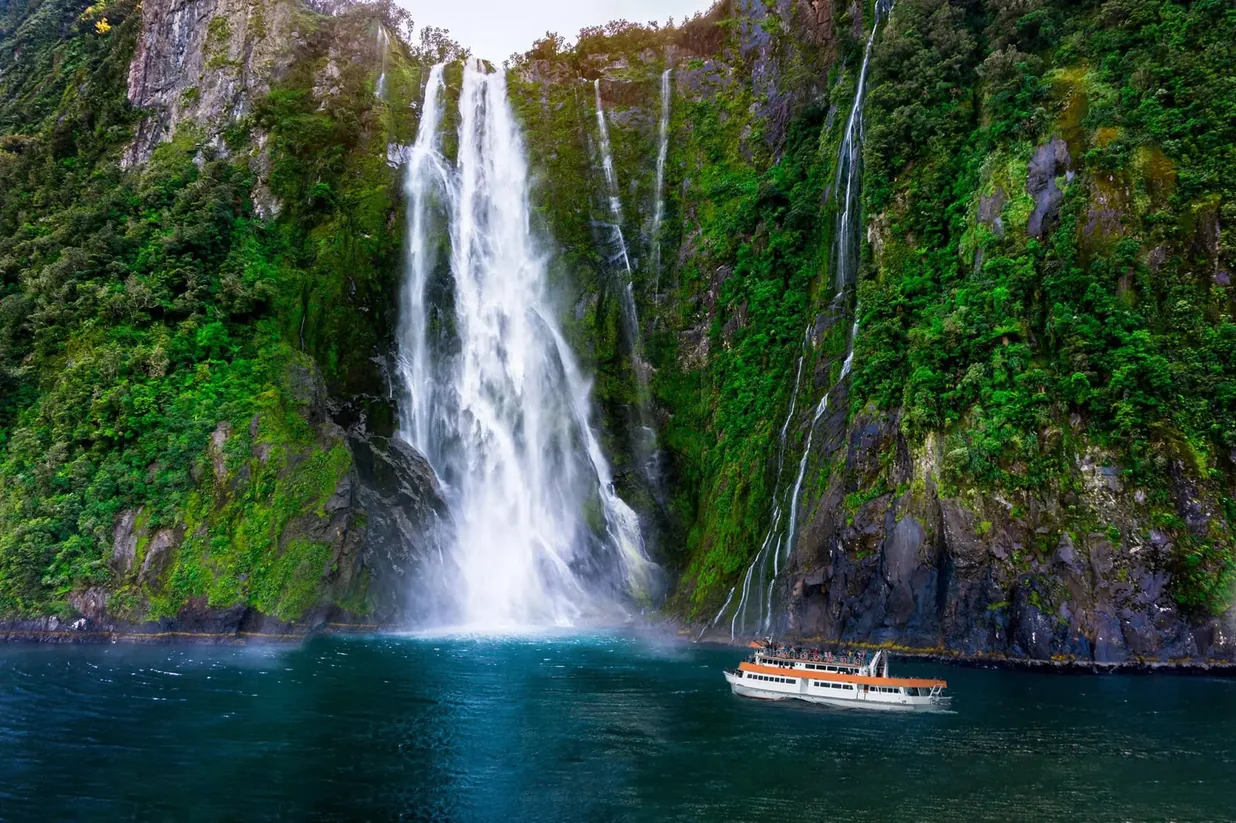
Follow the Milford Road through Fiordland National Park, stopping at Mirror Lakes and other viewpoints along the way.
At Milford Sound, board the 10:30 AM cruise beneath sheer cliffs and waterfalls before returning to Te Anau.
Breakfast — Te Anau
45 min
An early start. The whole day is built backward from the 10:30AM cruise, and the road, tunnel, parking and weather all have a say in how long the drive takes.
Depart Te Anau
The Milford Road is part of today’s experience, not simply the way to get there. We follow Lake Te Anau before entering the broad, glacier-carved Eglinton Valley, with mountains rising on both sides.
Mirror Lakes
20 min · short boardwalk
A short boardwalk leads to a series of small, dark tarns tucked beneath the Earl Mountains.
On a still morning, the mountains reflect almost perfectly in the water. Even the Mirror Lakes sign is mounted upside down so that it reads correctly only in its reflection.
Morning gives us our best chance of catching the water before the wind disturbs it.
The road into Fiordland
From here, the scenery gets progressively bigger. We continue through the Eglinton Valley and toward Monkey Creek, surrounded by steep alpine peaks. If weather and time allow, we’ll make a quick roadside stop.
Then the valley closes around us until the road appears to have nowhere left to go. The Homer Tunnel, begun in 1935, cuts directly through the mountain. More than three-quarters of a mile later, we emerge on the other side and descend dramatically toward Milford.
Milford Sound — arrive and park
Allow 45 min before boarding
The car park is a 10–15 minute walk from the cruise terminal, and it fills through the morning. Arriving three-quarters of an hour early is the difference between a calm boarding and a rushed one.
Milford Sound cruise
~1h45–2 hrs
Milford is actually a fiord carved by glaciers, which is why its mountains don’t simply surround the water — they appear to rise almost vertically from it.
Mitre Peak towers 5,560 feet above the fiord, while enormous waterfalls plunge from hanging valleys high overhead.
At Stirling Falls, water drops nearly 500 feet in a single column. Smaller cruise boats often nose right beneath the spray — stand outside if you’re willing to get wet.
Lady Bowen Falls is taller still and provides Milford’s small settlement with both water and hydroelectric power.
The cruise travels the length of the fiord toward the Tasman Sea, with chances to see New Zealand fur seals stretched out on the rocks and, if we’re lucky, dolphins or penguins.
Lunch — Milford
45 min
Eat at the terminal after the cruise, or bring something from Te Anau.
Depart Milford
With the cruise done by lunchtime, the drive back is unhurried — there is time for the stops we skipped this morning while we were watching the clock. The Chasm and Monkey Creek are both worth it.
Return to Te Anau
If it rains, good
Milford receives an extraordinary amount of rain — and a rainy day here can be more dramatic than a sunny one.
Water suddenly pours from the mountains in hundreds of temporary waterfalls, some dropping hundreds of feet down sheer rock walls before disappearing again when the rain stops.
Blue skies show us the scale. Rain makes the cliffs come alive.
Dinner — Te Anau
1½ hours
Sandflies. They’re particularly persistent around the Milford wharf and shoreline. Bring a good insect repellent and apply it before getting out of the car. Long sleeves and pants help.
No reliable mobile coverage. Download maps, music and anything else we want before leaving Te Anau.
Weather. Don’t judge this day by the forecast. Fiordland weather changes quickly, and Milford is one of those rare places where rain can actually improve what we’ve come to see.
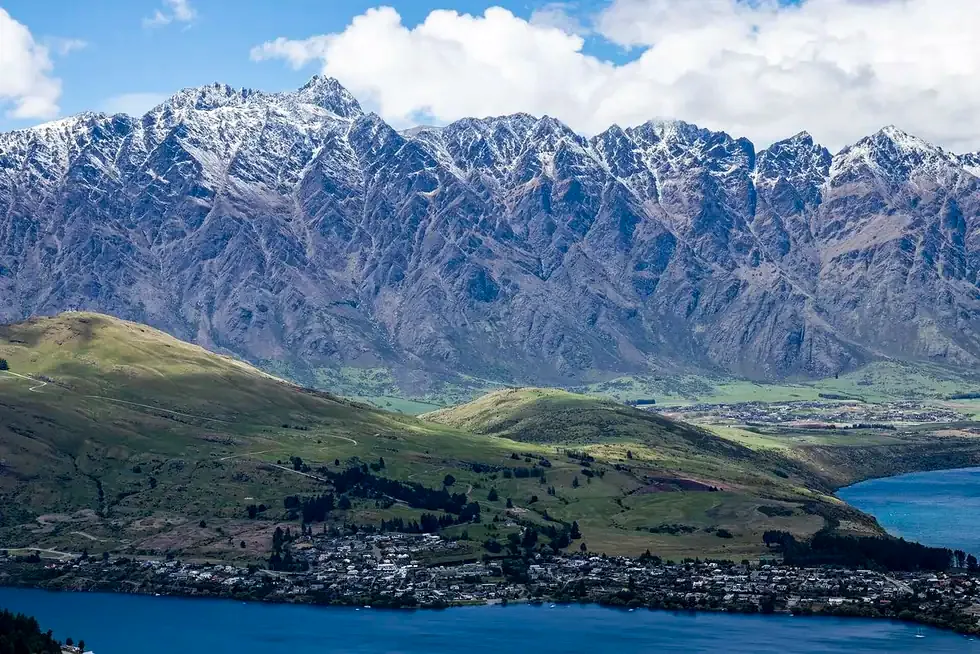 Te Anau → Queenstown → Auckland~105 mi · about 2 hrs driving · then NZ630, 2:15PM–4:05PM
Drive from Te Anau to Queenstown Airport, return the van and fly nonstop to Auckland on Air New Zealand NZ630, 2:15 PM–4:05 PM.
Breakfast — Te Anau
1 hour
No need to rush — the flight is not until early afternoon.
Depart Te Anau
North through Southland to Queenstown Airport. Fuel the van at Frankton, just before the airport, rather than hunting for a station at the terminal.
Queenstown Airport
Return the van and check in · allow about 1½ hours
Two and a half hours before departure covers the van return, bag drop and security with room to spare. Queenstown is a small airport but a busy one in February.
Lunch at the terminal once everything is checked.
Queenstown → Auckland
Air New Zealand NZ630 · 1h50 · nonstop
Arrives Auckland 4:05PM.
Auckland Airport — check in
Stay beside the international terminal, have dinner and repack anything we need for the flight home.
Dinner — Auckland Airport
Walk to the international terminal and fly home.
Another itinerary
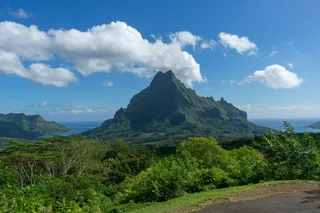
Seven nights in the Society Islands aboard Windstar’s Wind Star.